
THIS POST MAY CONTAIN AFFILIATE LINKS. PLEASE READ MY DISCLOSURE FOR MORE INFO.
For the last few years, everywhere I’ve been I seem to be drawn in by the industrial, vintage, warehouse look. I love the modern yet hand made rough feeling it brings to a room. Especially when it’s the main focal point of a room or wall.
Before we jump into the assemblage of this full wall piece, I have to give you the low down…this was not easy and it was not quick. The only reason we were able to complete this was because my dad was insanely helpful. I’m not down grading any girls strength but it couldn’t hurt to find a very strong gentlemen to help out. There were definitely a few steps we could of done differently to save time but of course 20-20 hindsight and these DIY Full Wall Industrial Piping Shelves still came out amazing!
::MATERIALS NEEDED::
Paper, Pencil, Level, Powerlock Measuring Tape
, 90 Degree Street Elbow, Elbow, Nipple, Cap, Floor Flange, Threaded Tee, Black Interior and Exterior Decorator Paint
, Wood Finish Interior Wood Stain
, Wood, Drill, Screws, and different height pipes
*Please remember we built these shelves to the exact measurements of my design and to my specific wall and closet doors. This is a “getting you started” DIY post and you will still need to measure and base your materials needed off your specific wall and design. Also a great big thank you to Home Depot for having every single piping material I needed!
You ready for this!? Lets jump in!
::INSTRUCTIONS:
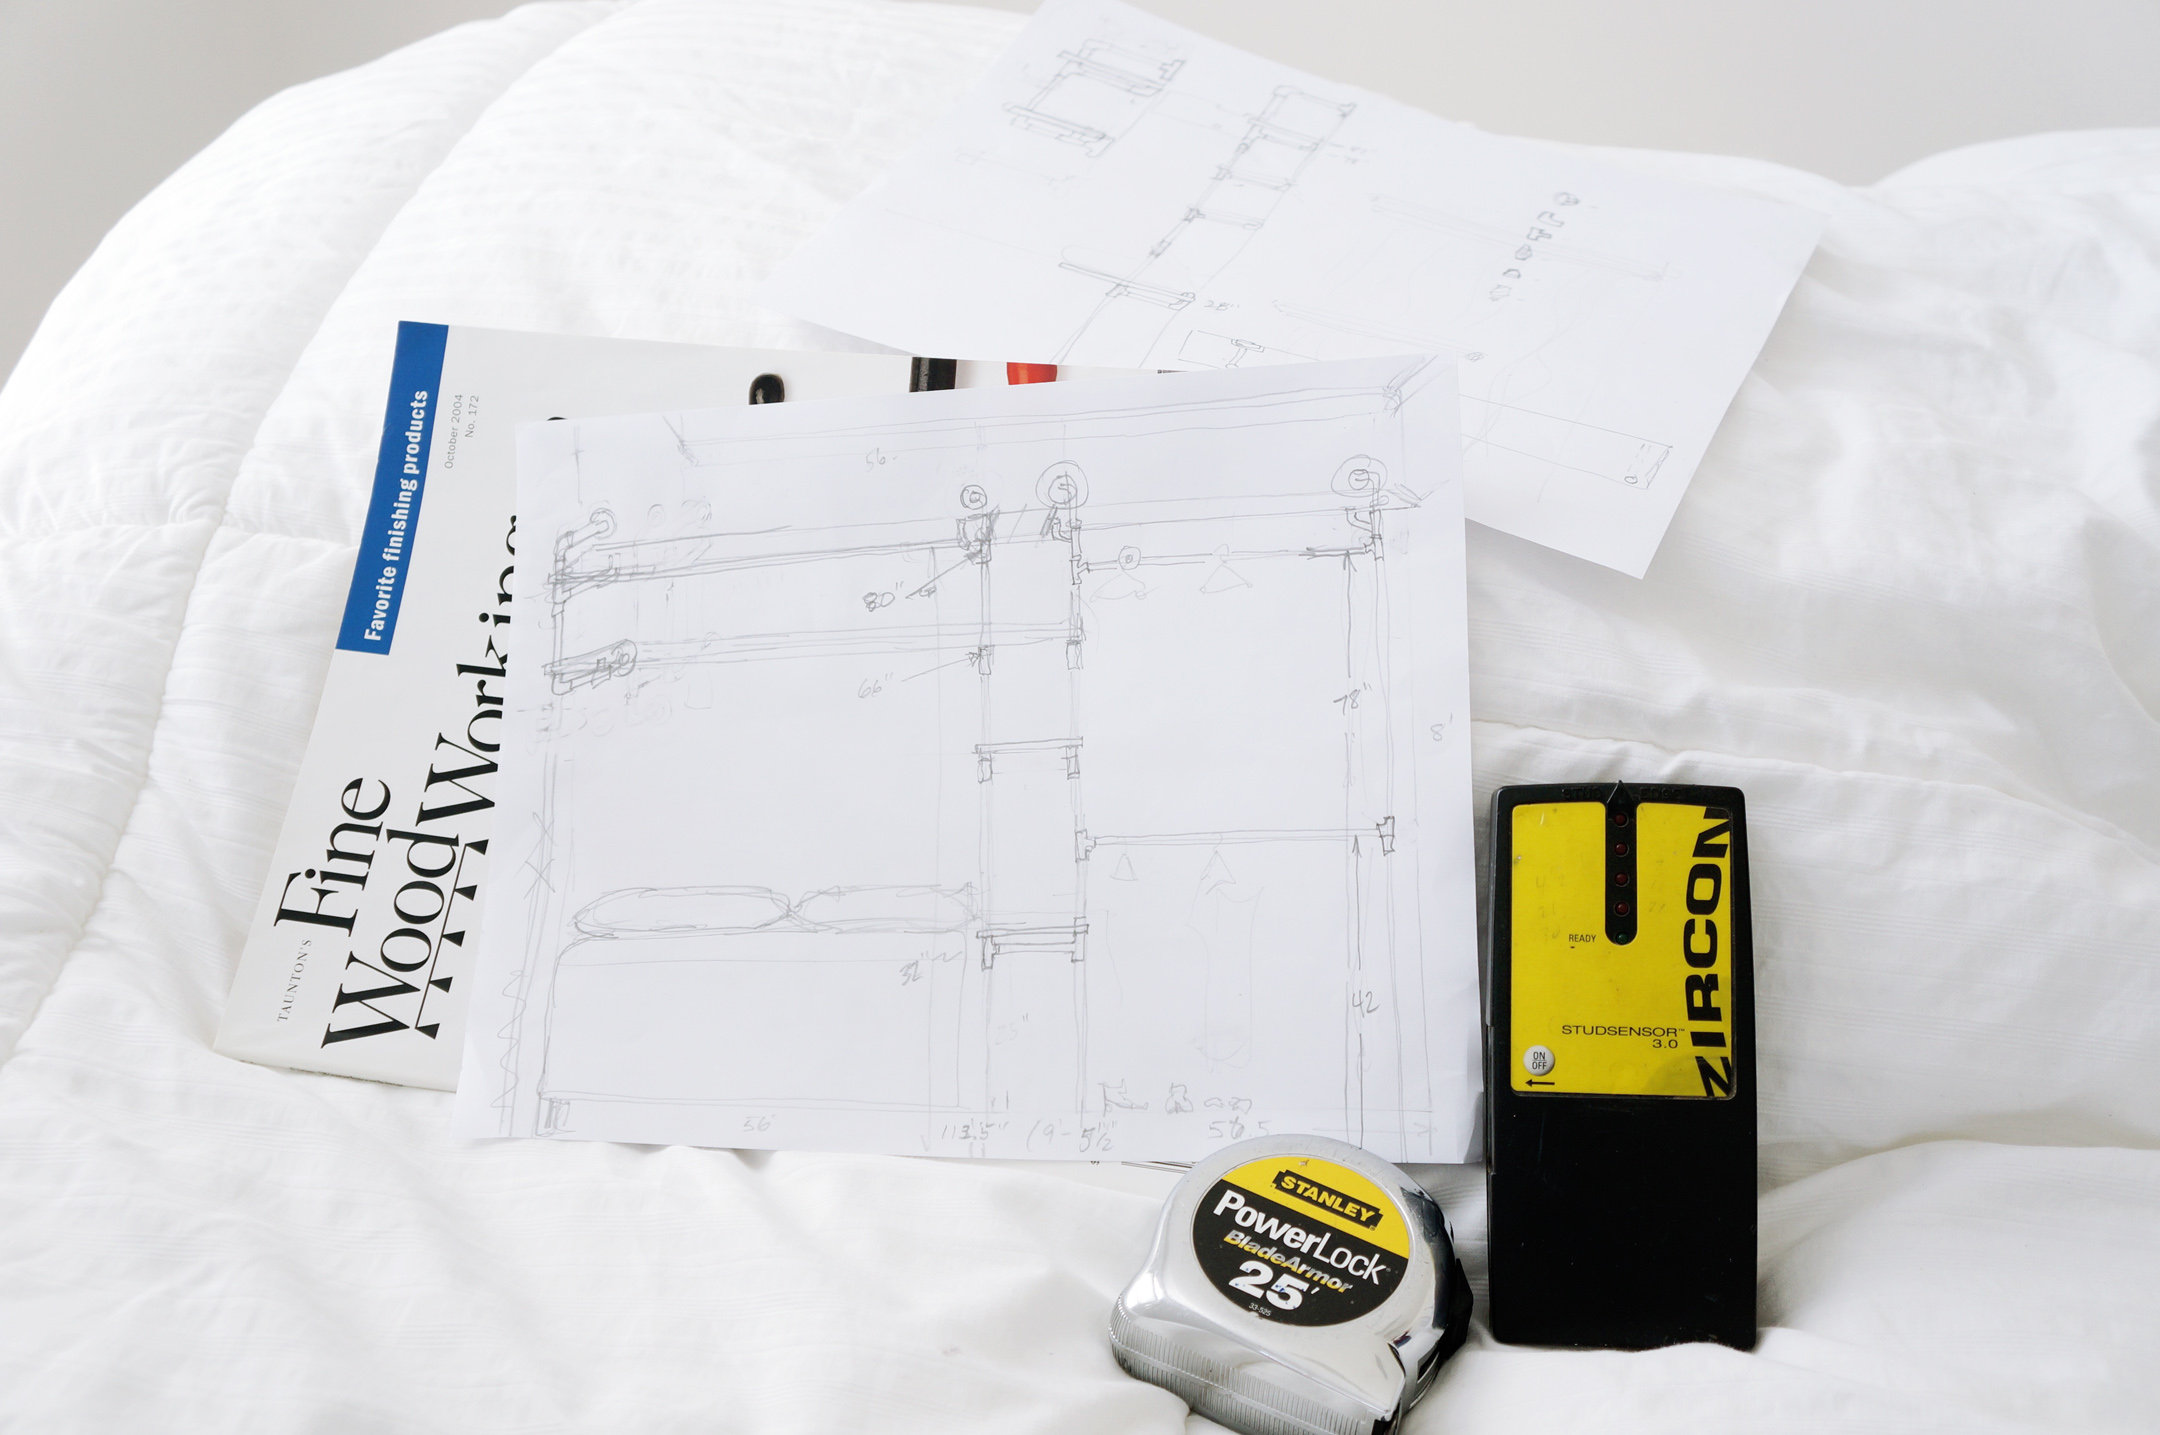
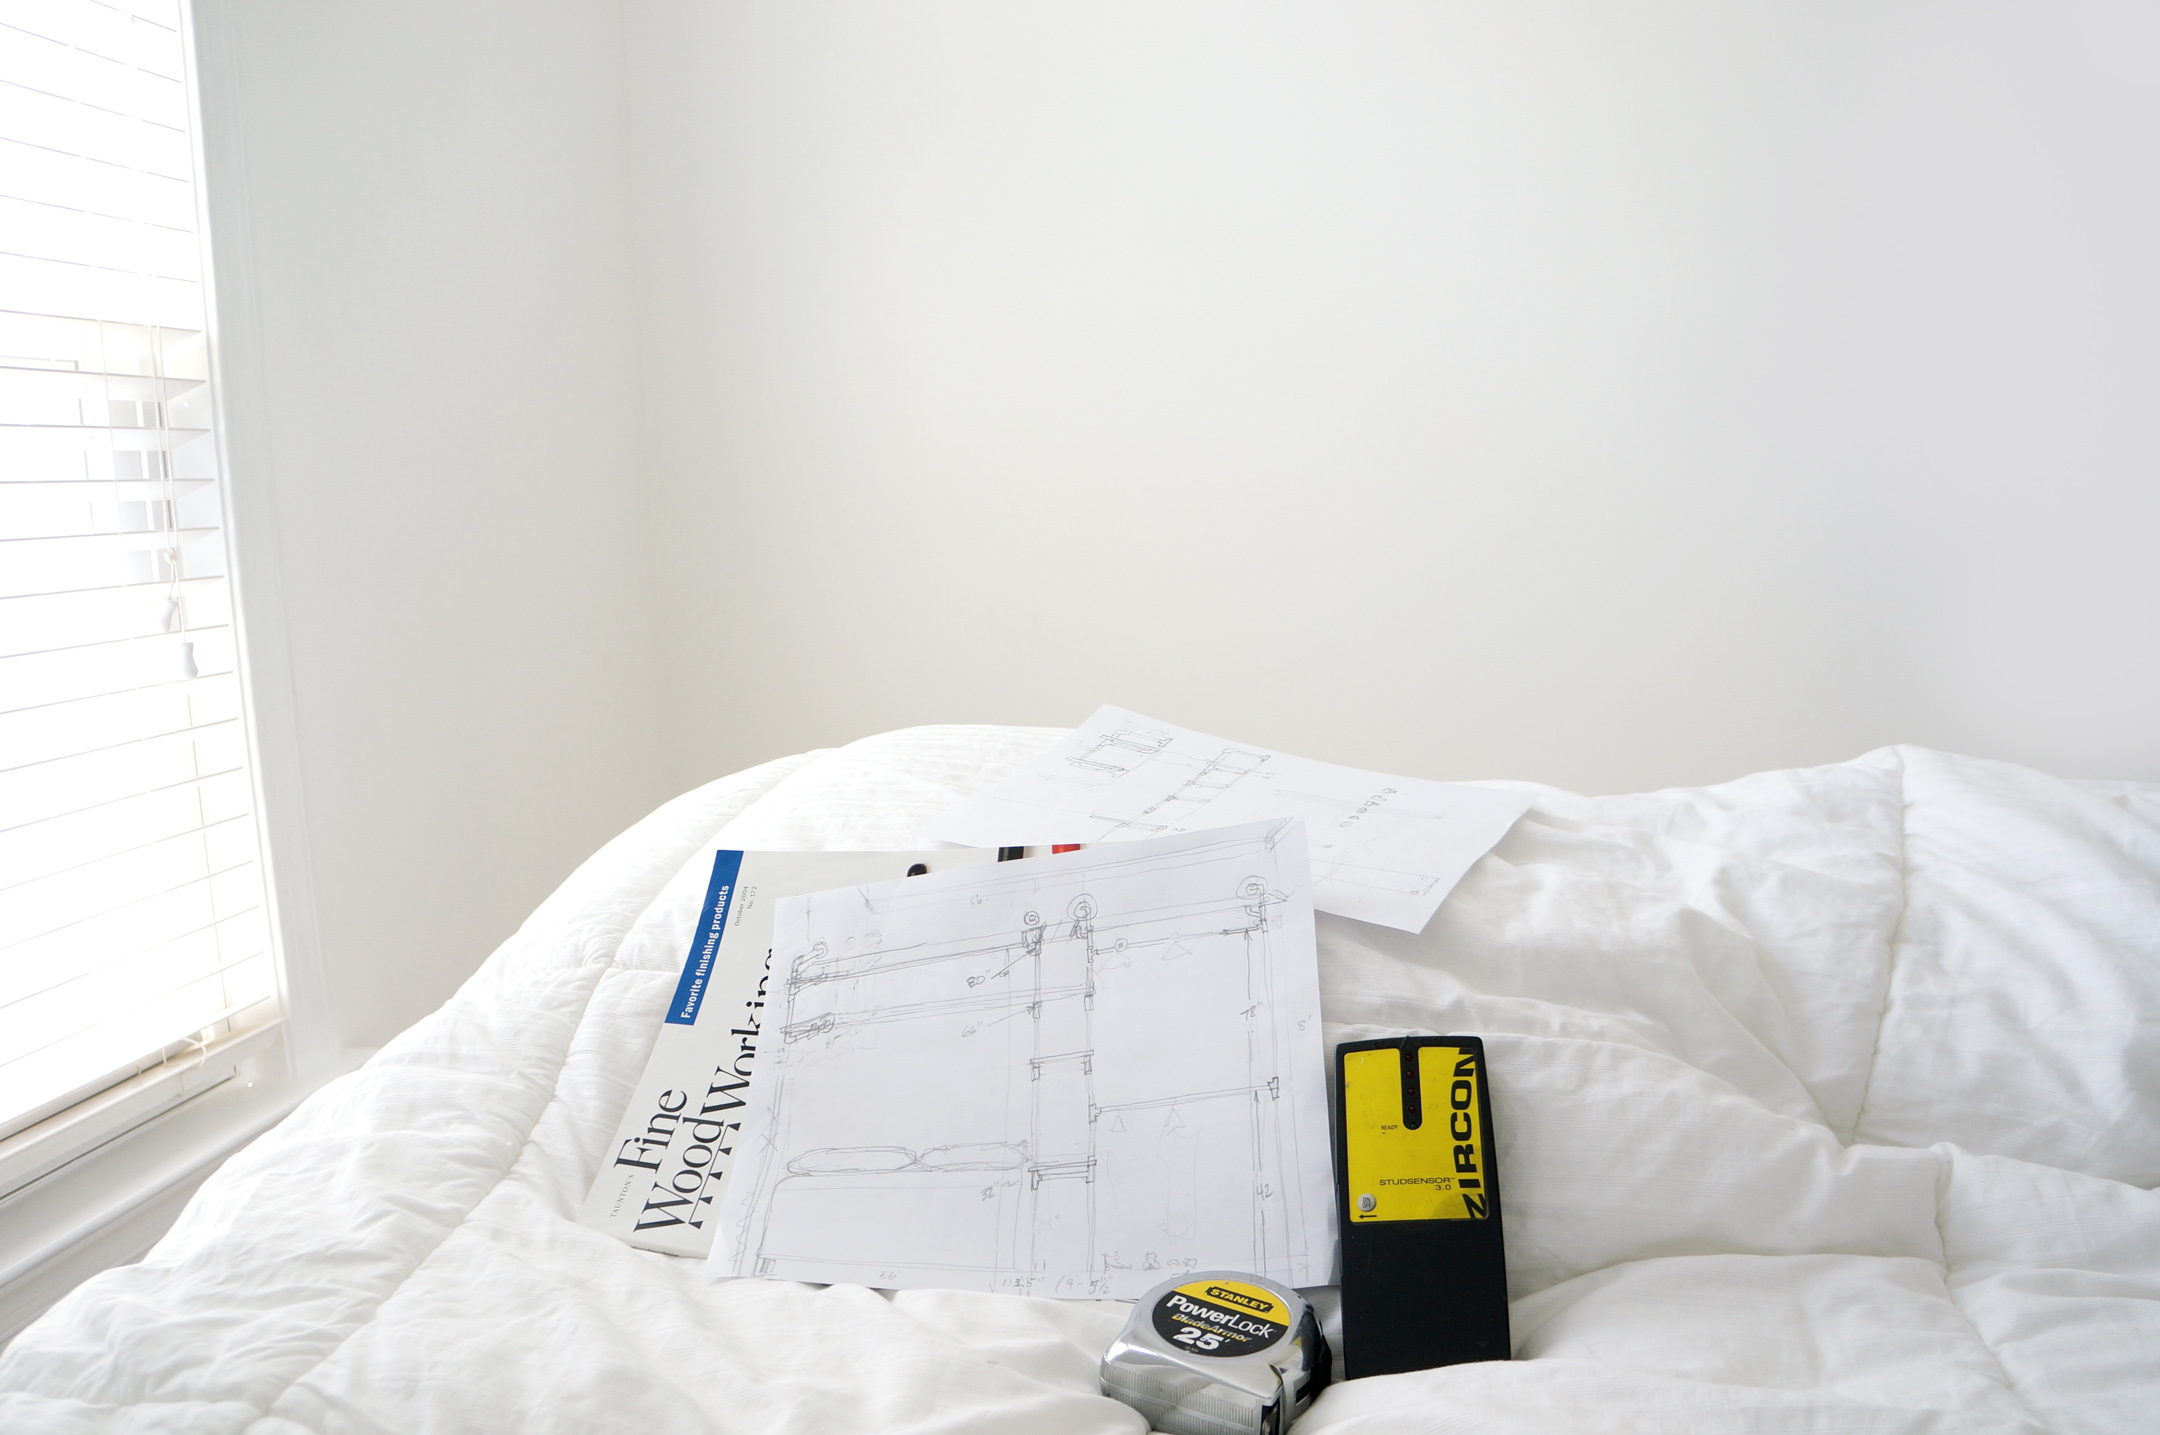
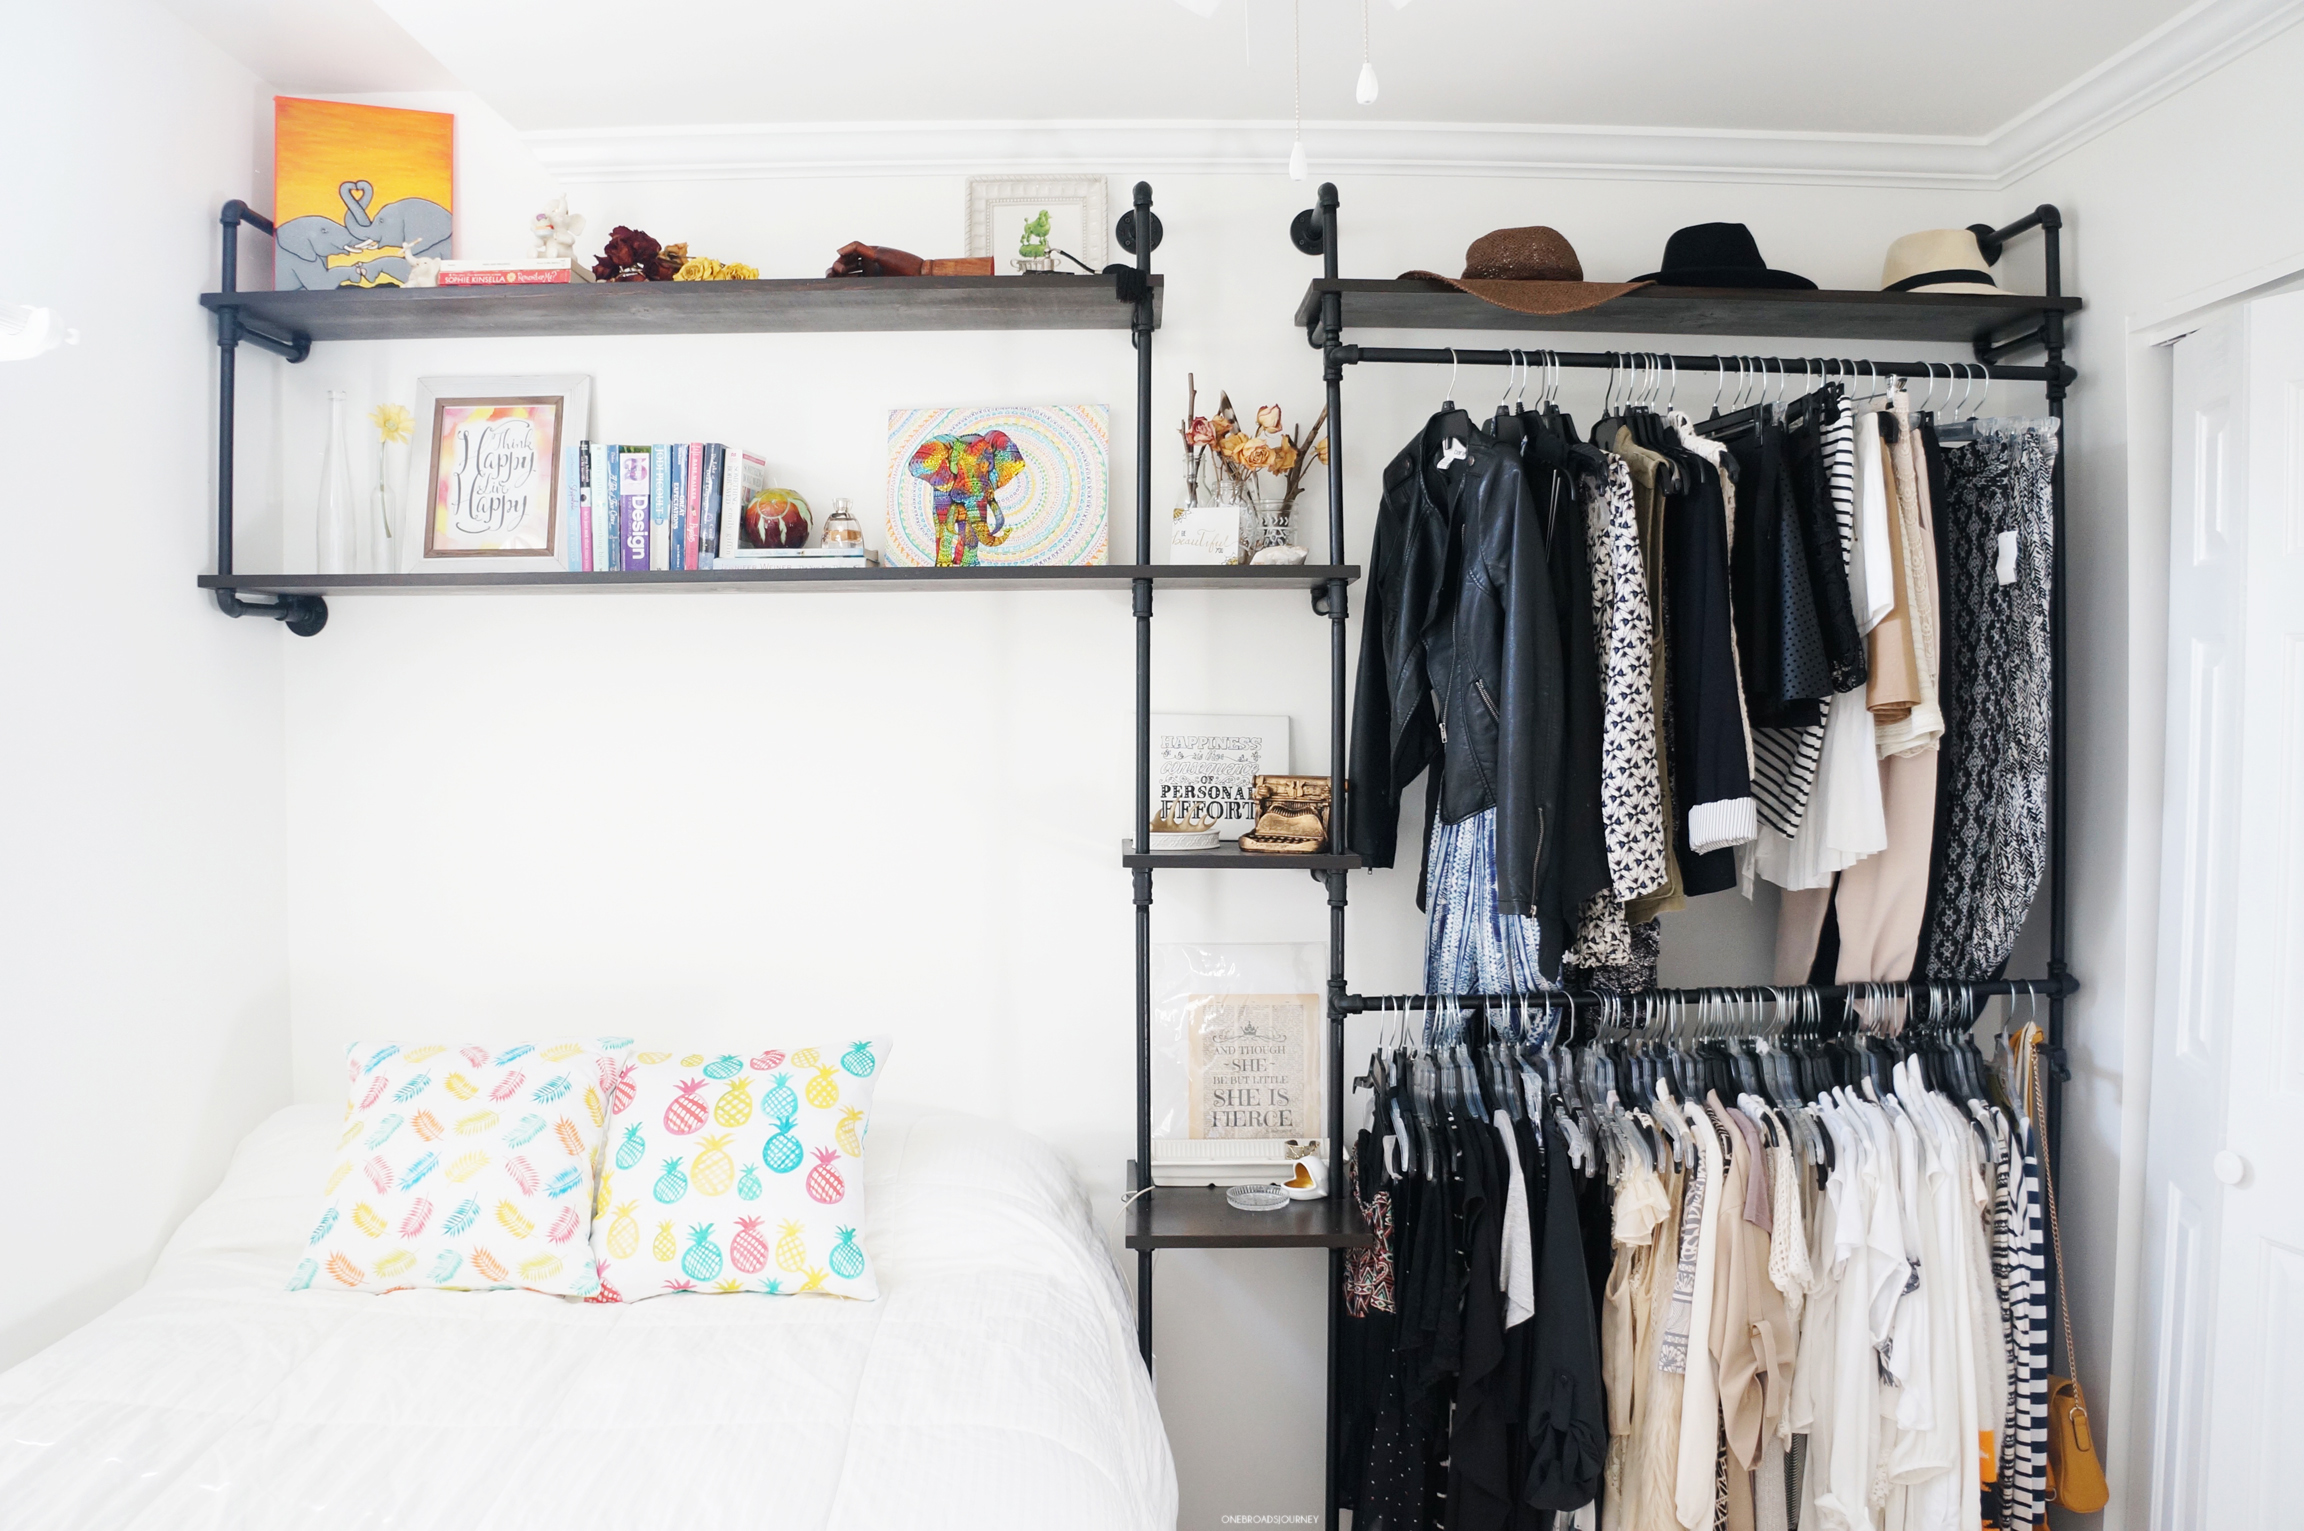
1.Plan out your design. There were a lot of decision when I planned out this design. I knew I wanted:
> my shelves to cover the entire wall
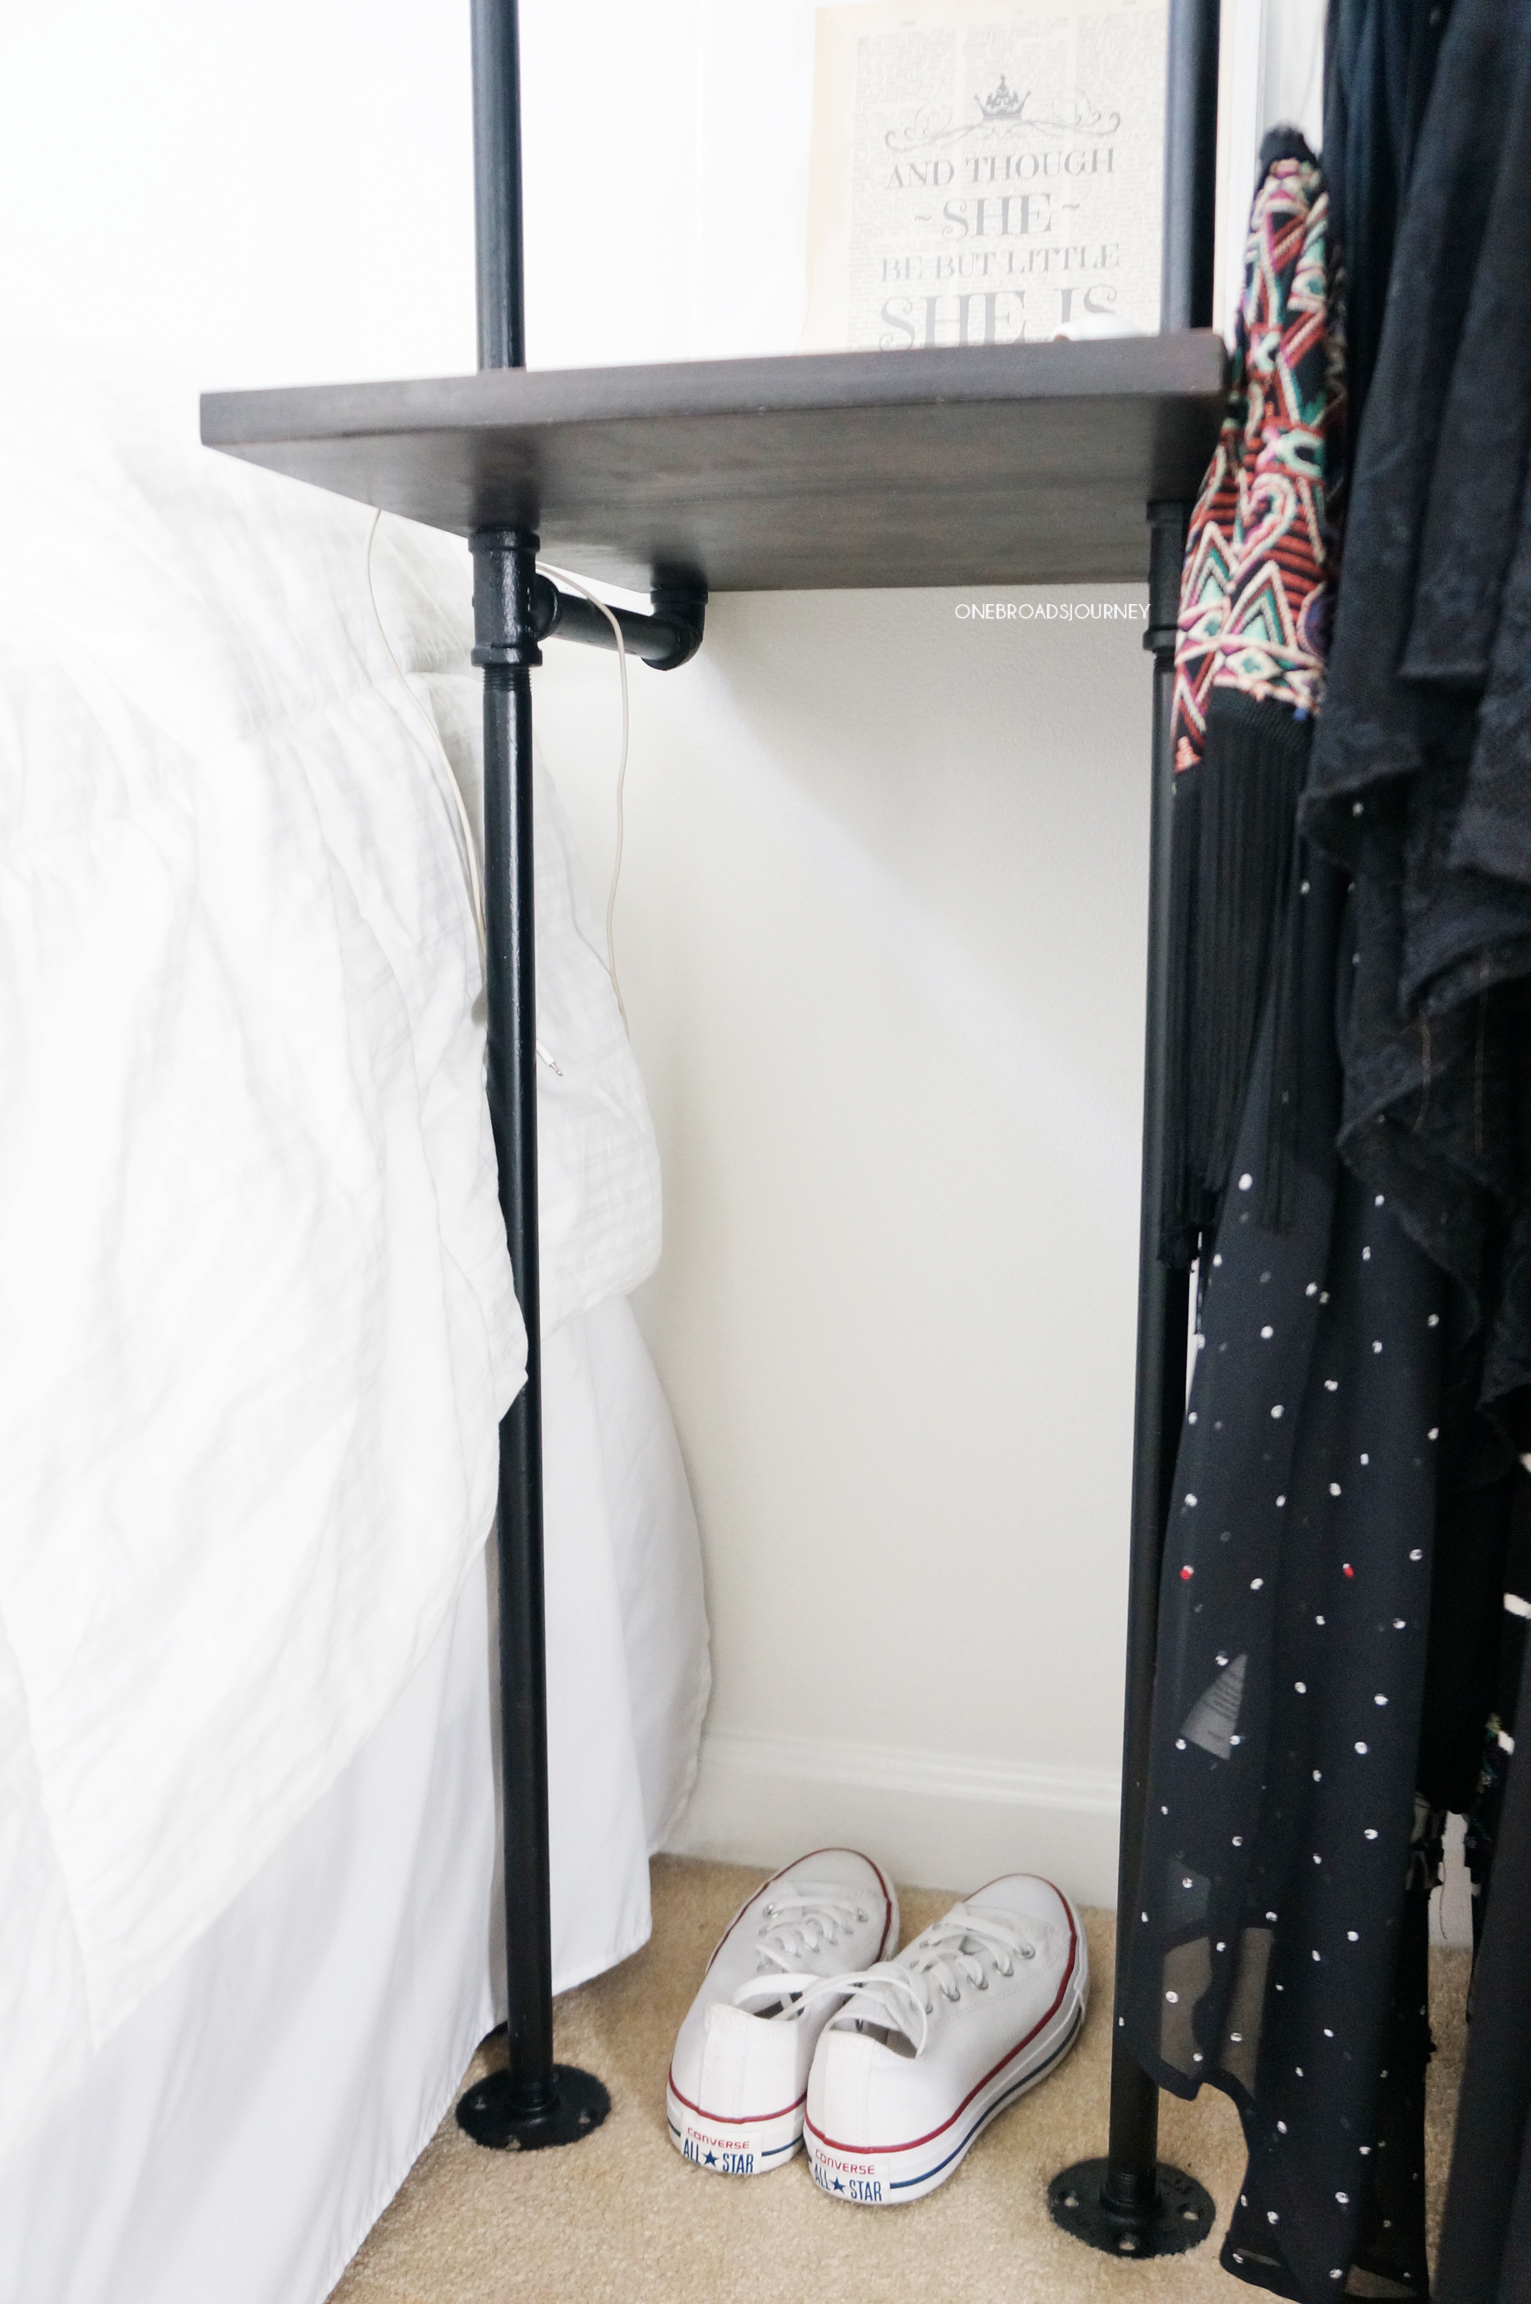
> a drink shelf next to my bed
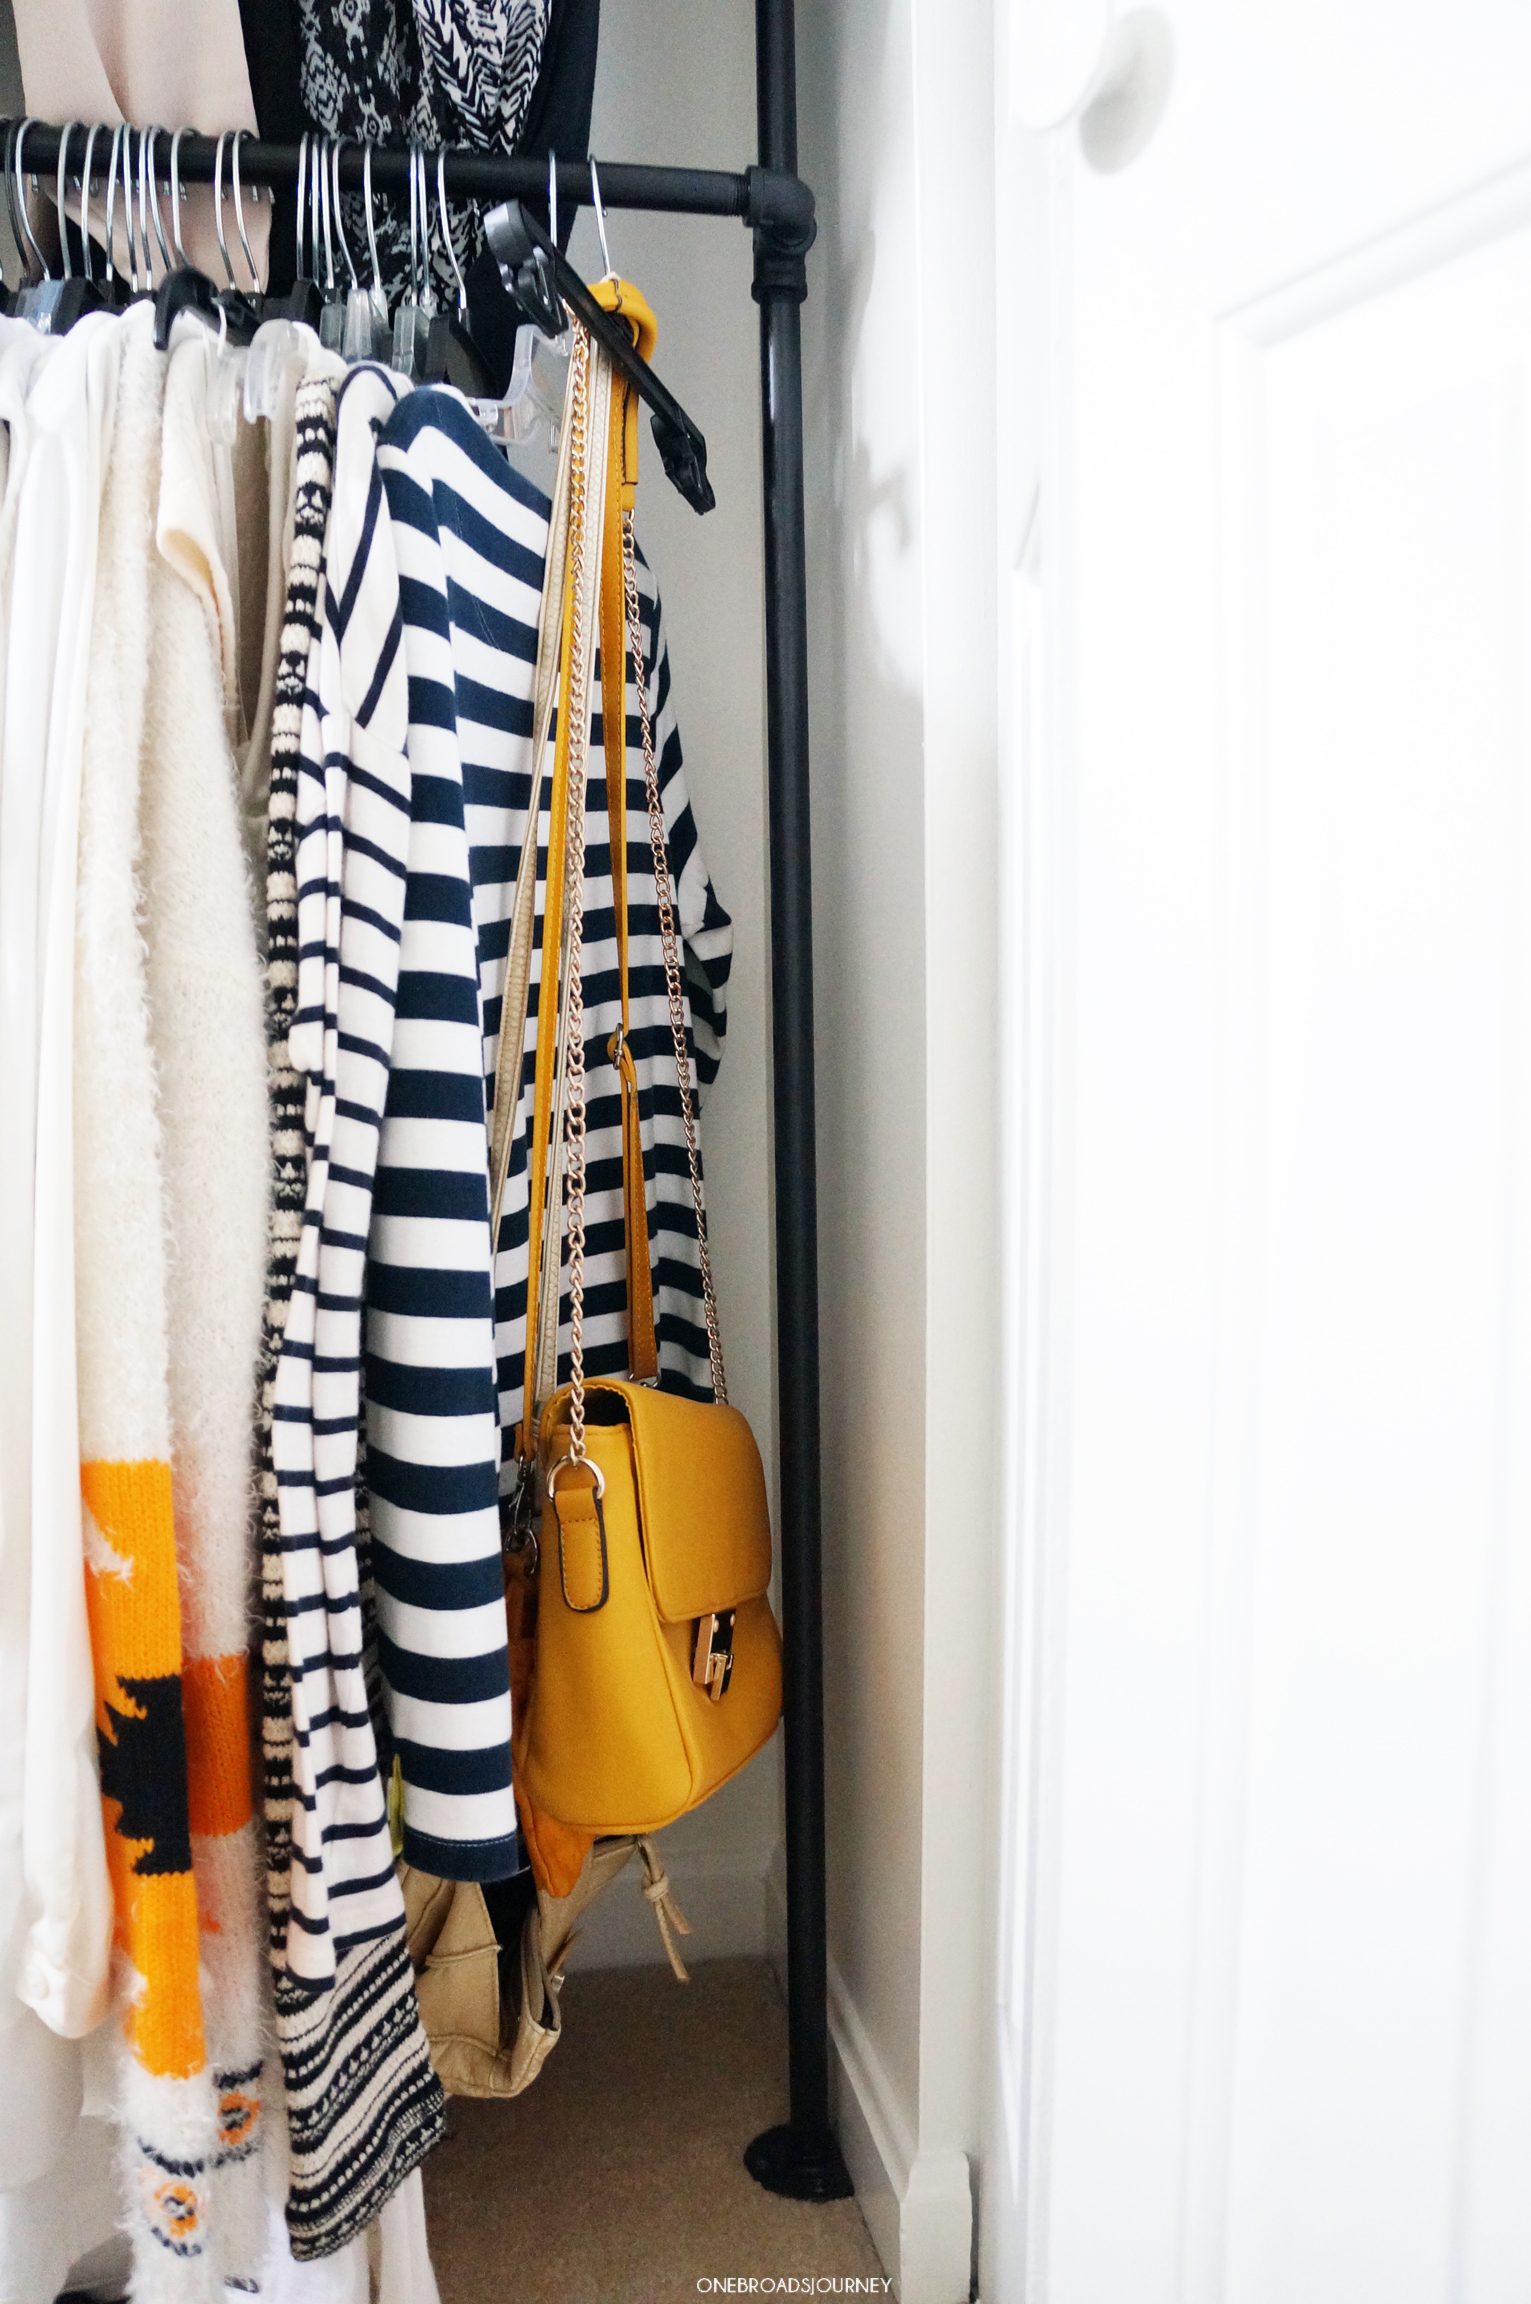
> needed an area to hang clothes
> needed my bed to fit between the wall and drink shelf
> wanted long and short shelves for design purposes
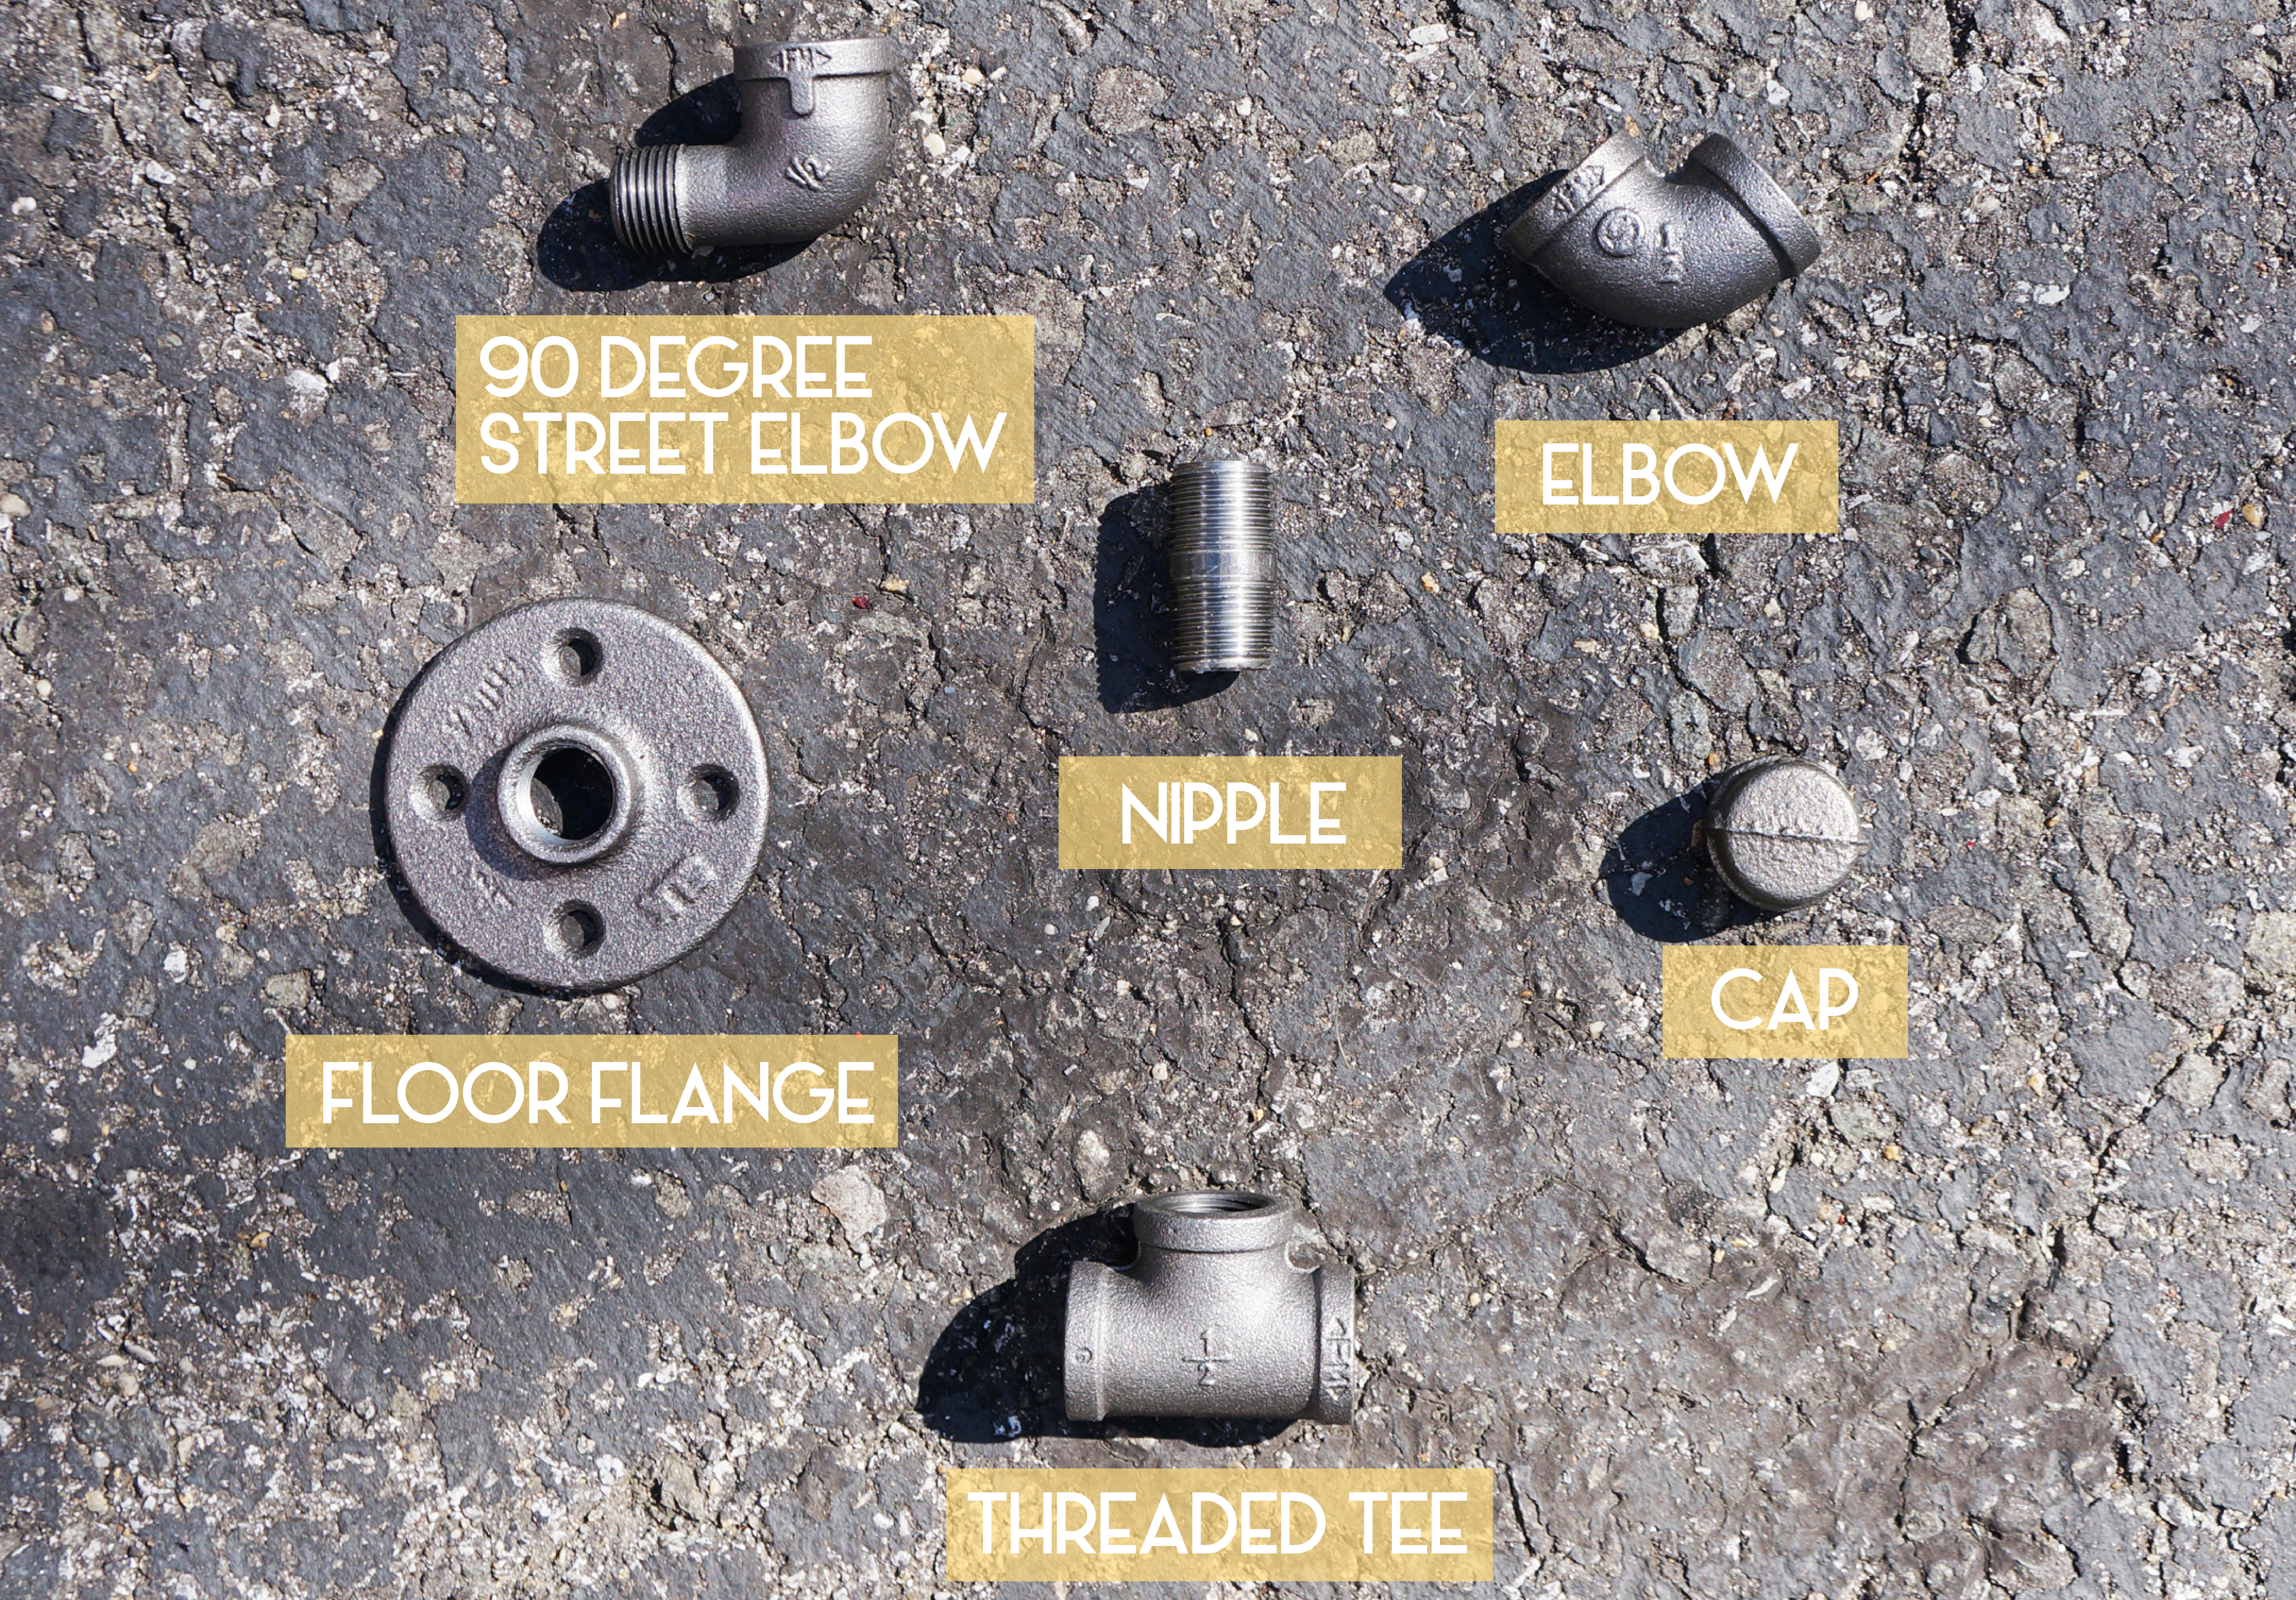
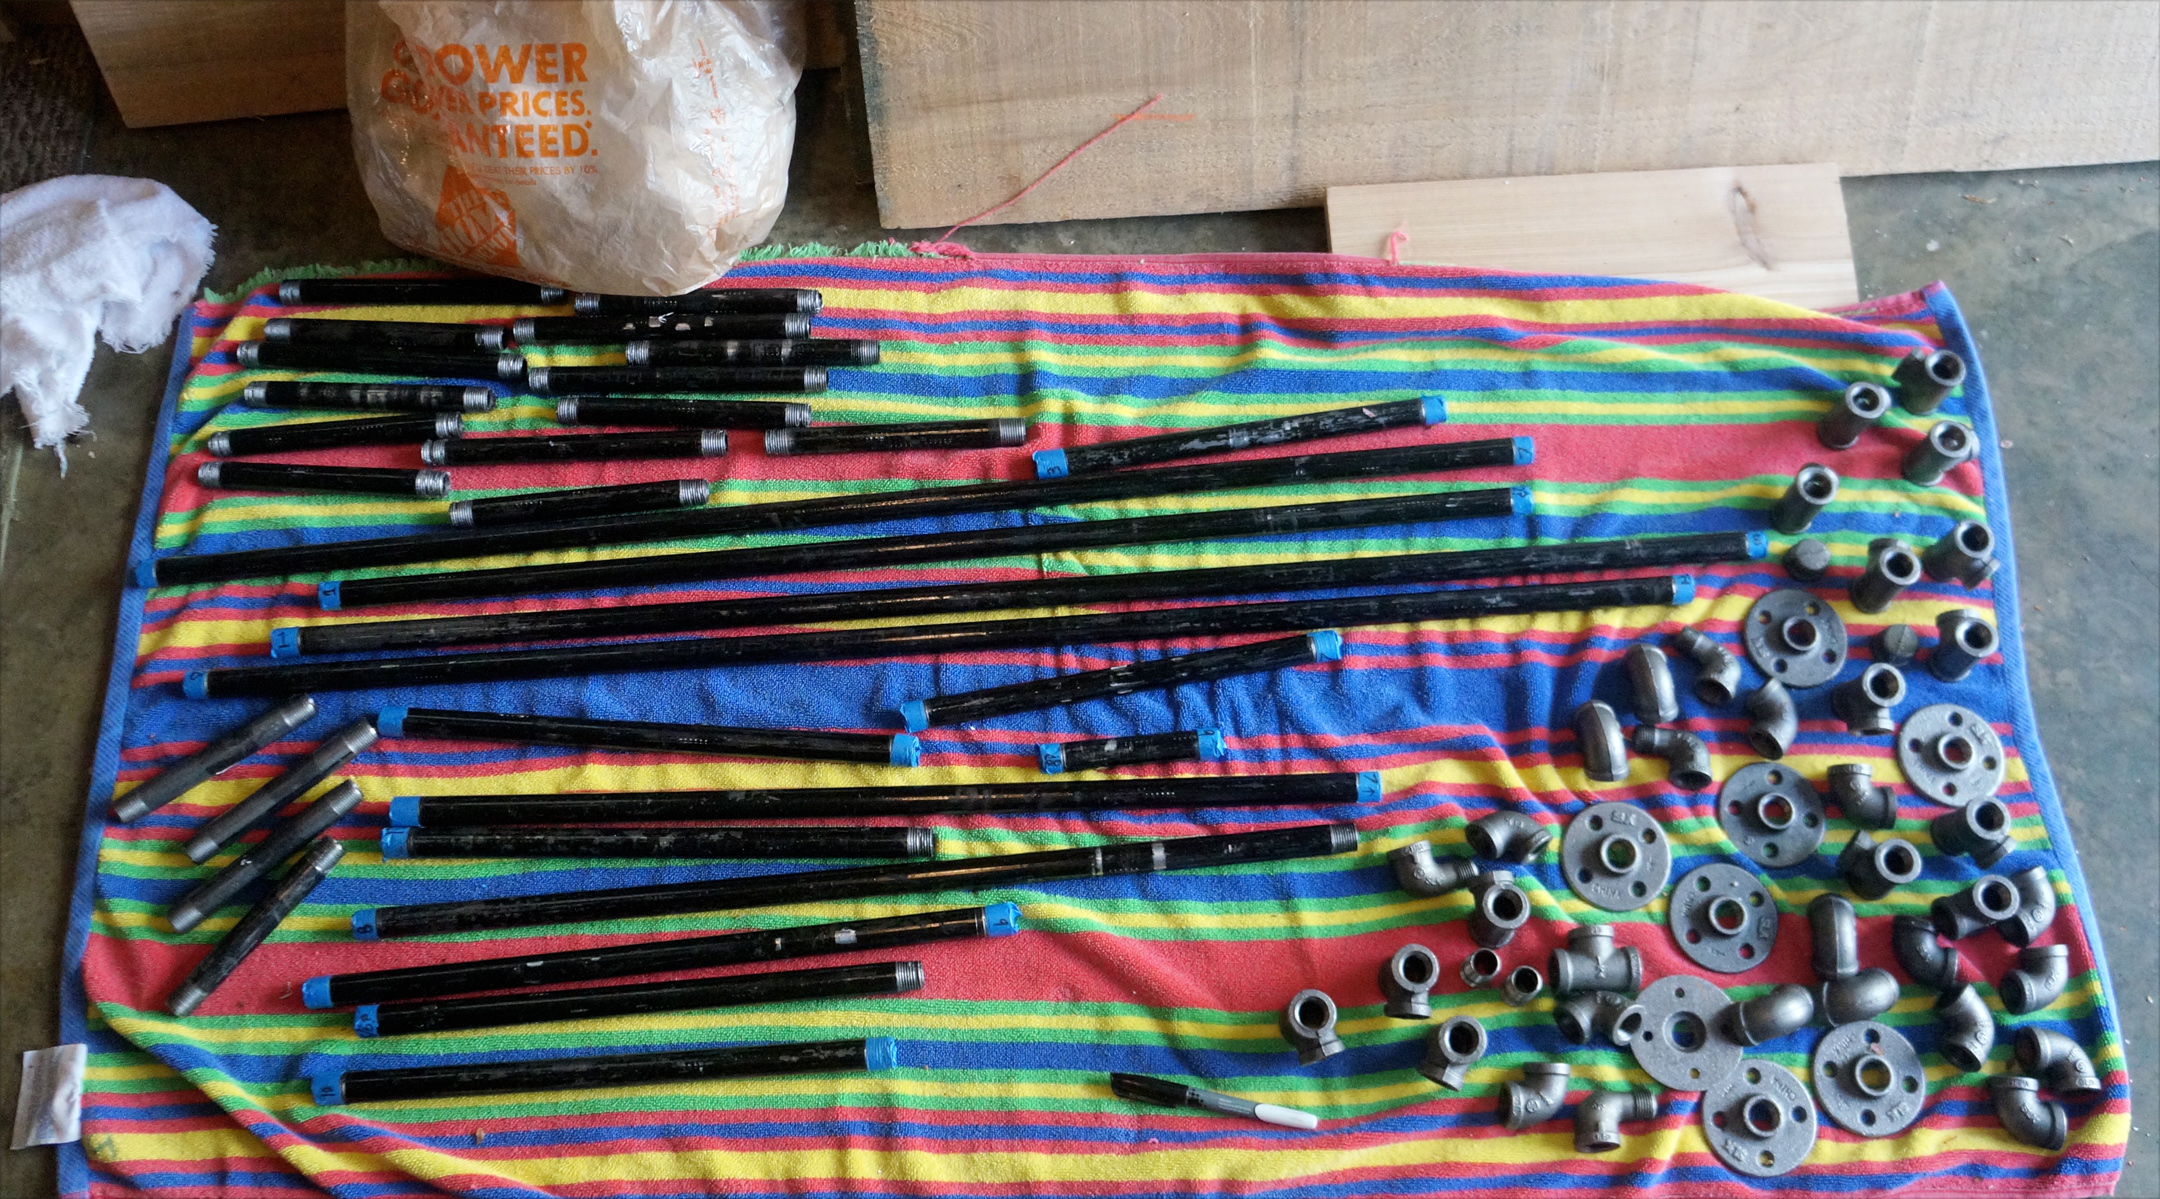
2. After planning out your design, figure out how many of each material you’ll need. Here’s a reference and what they’re used for:
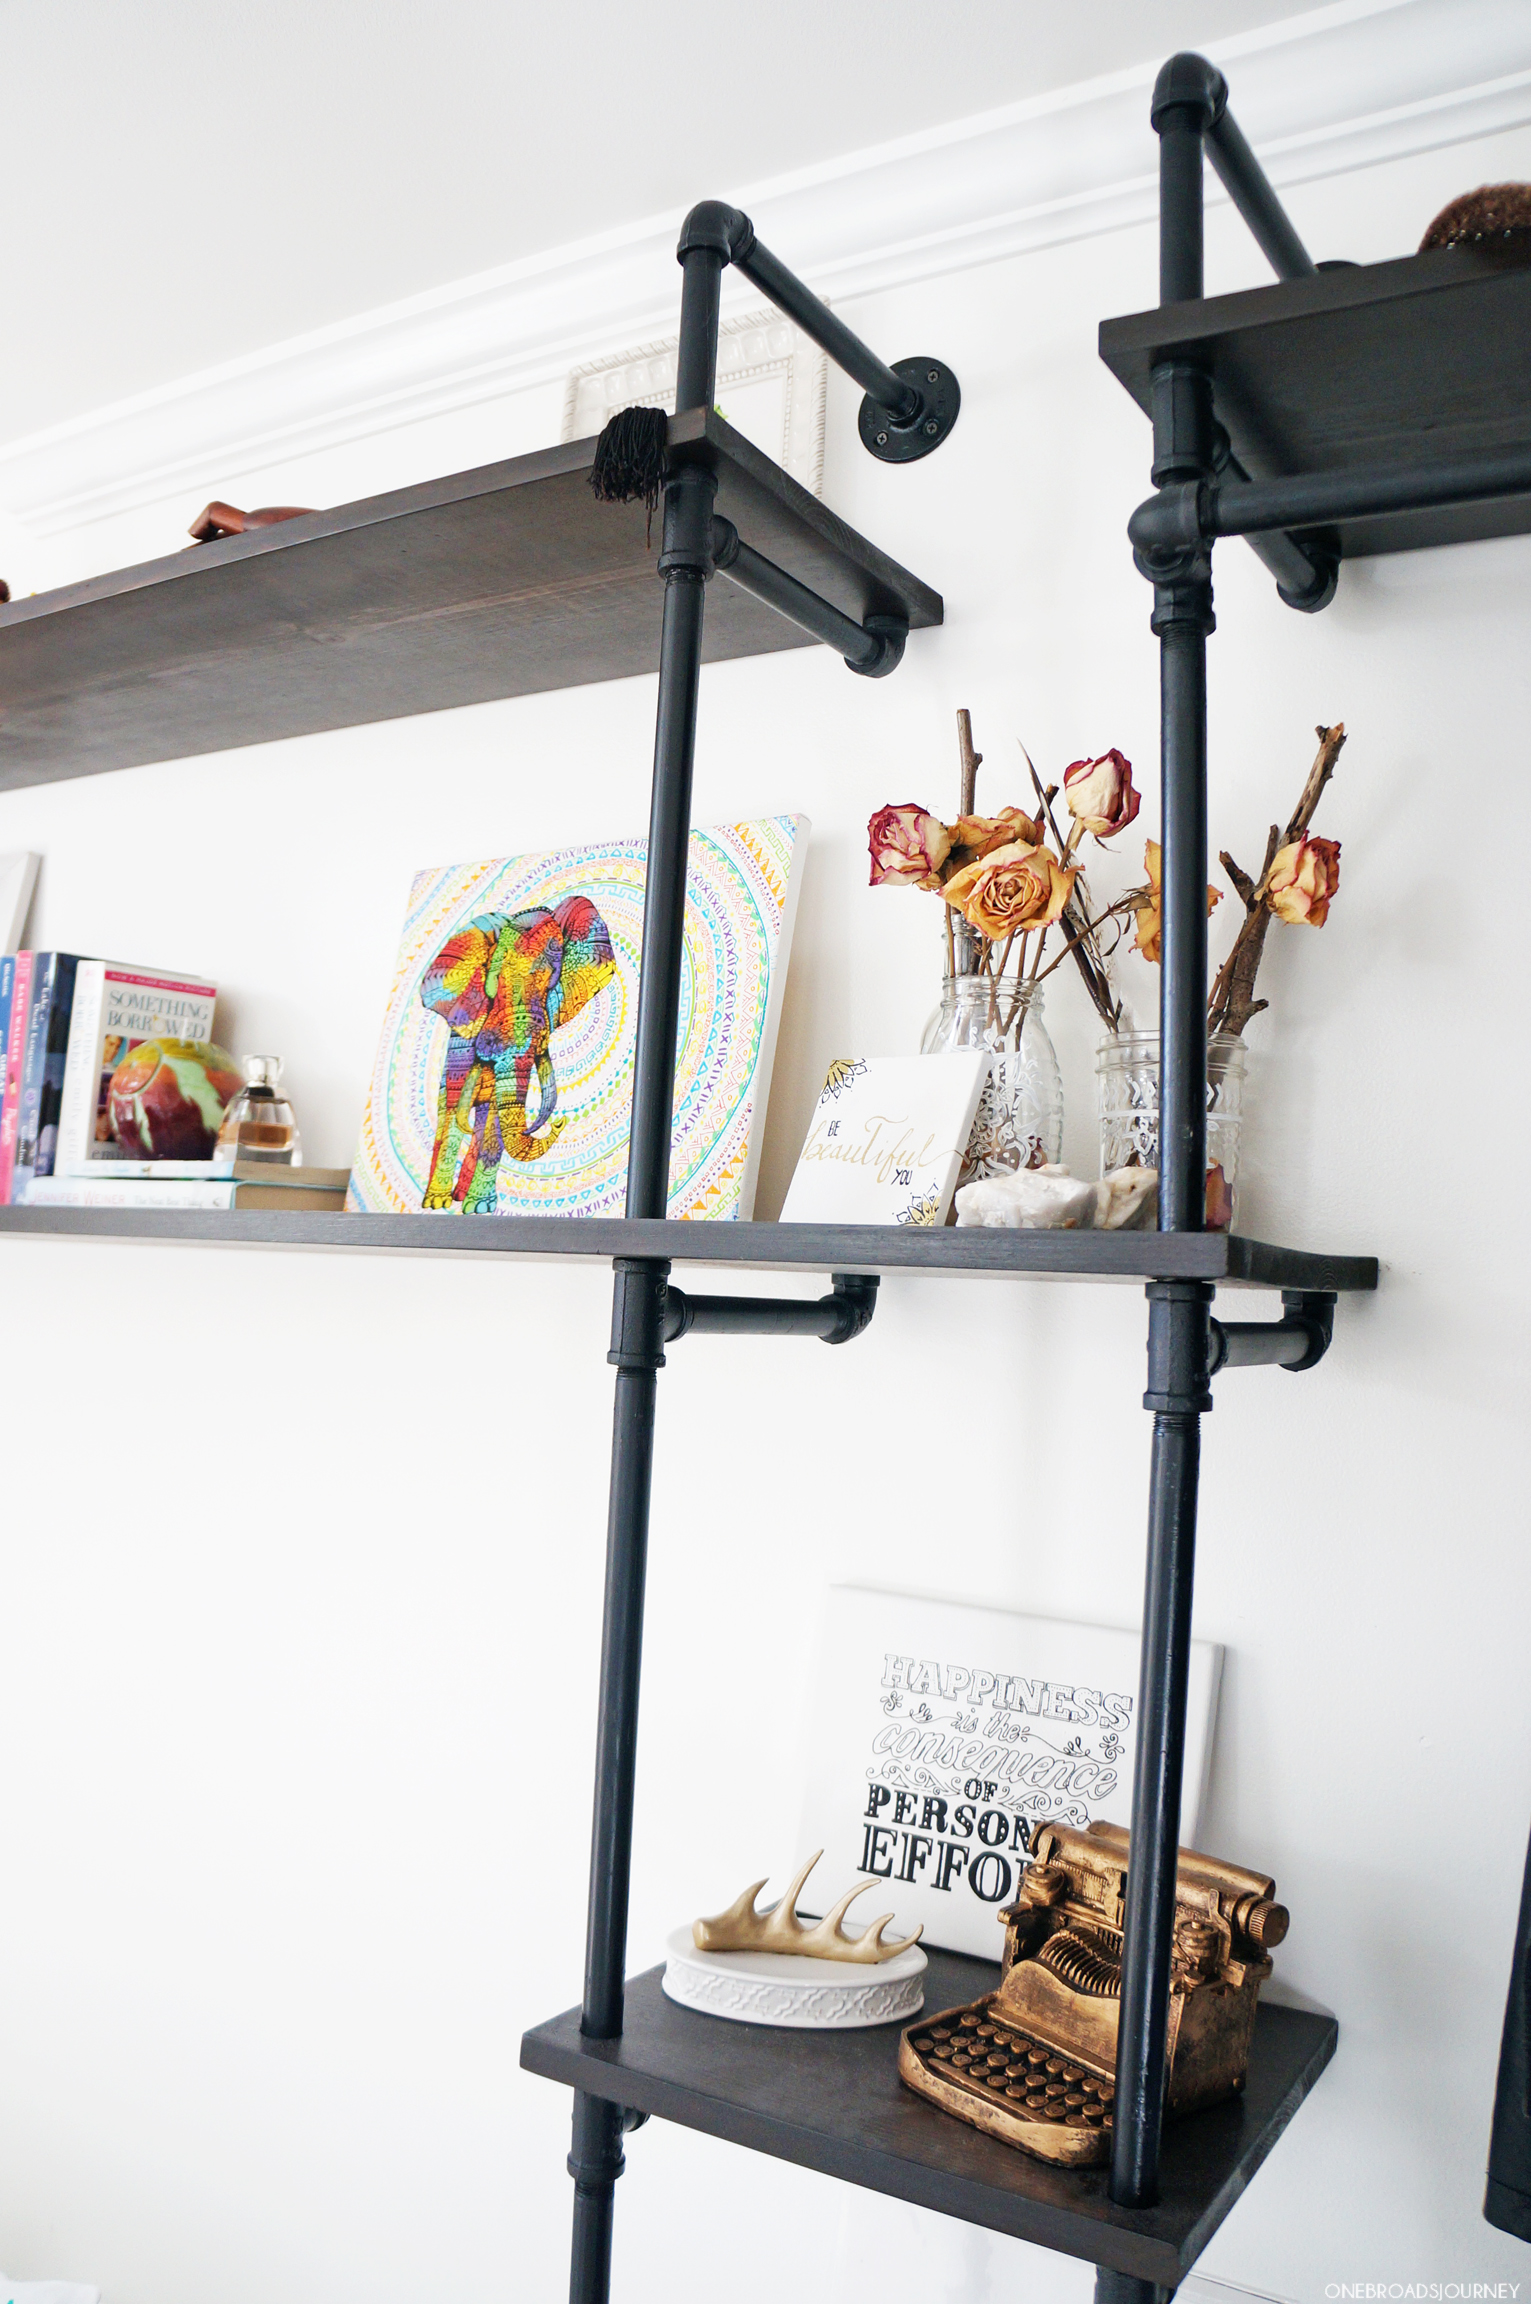
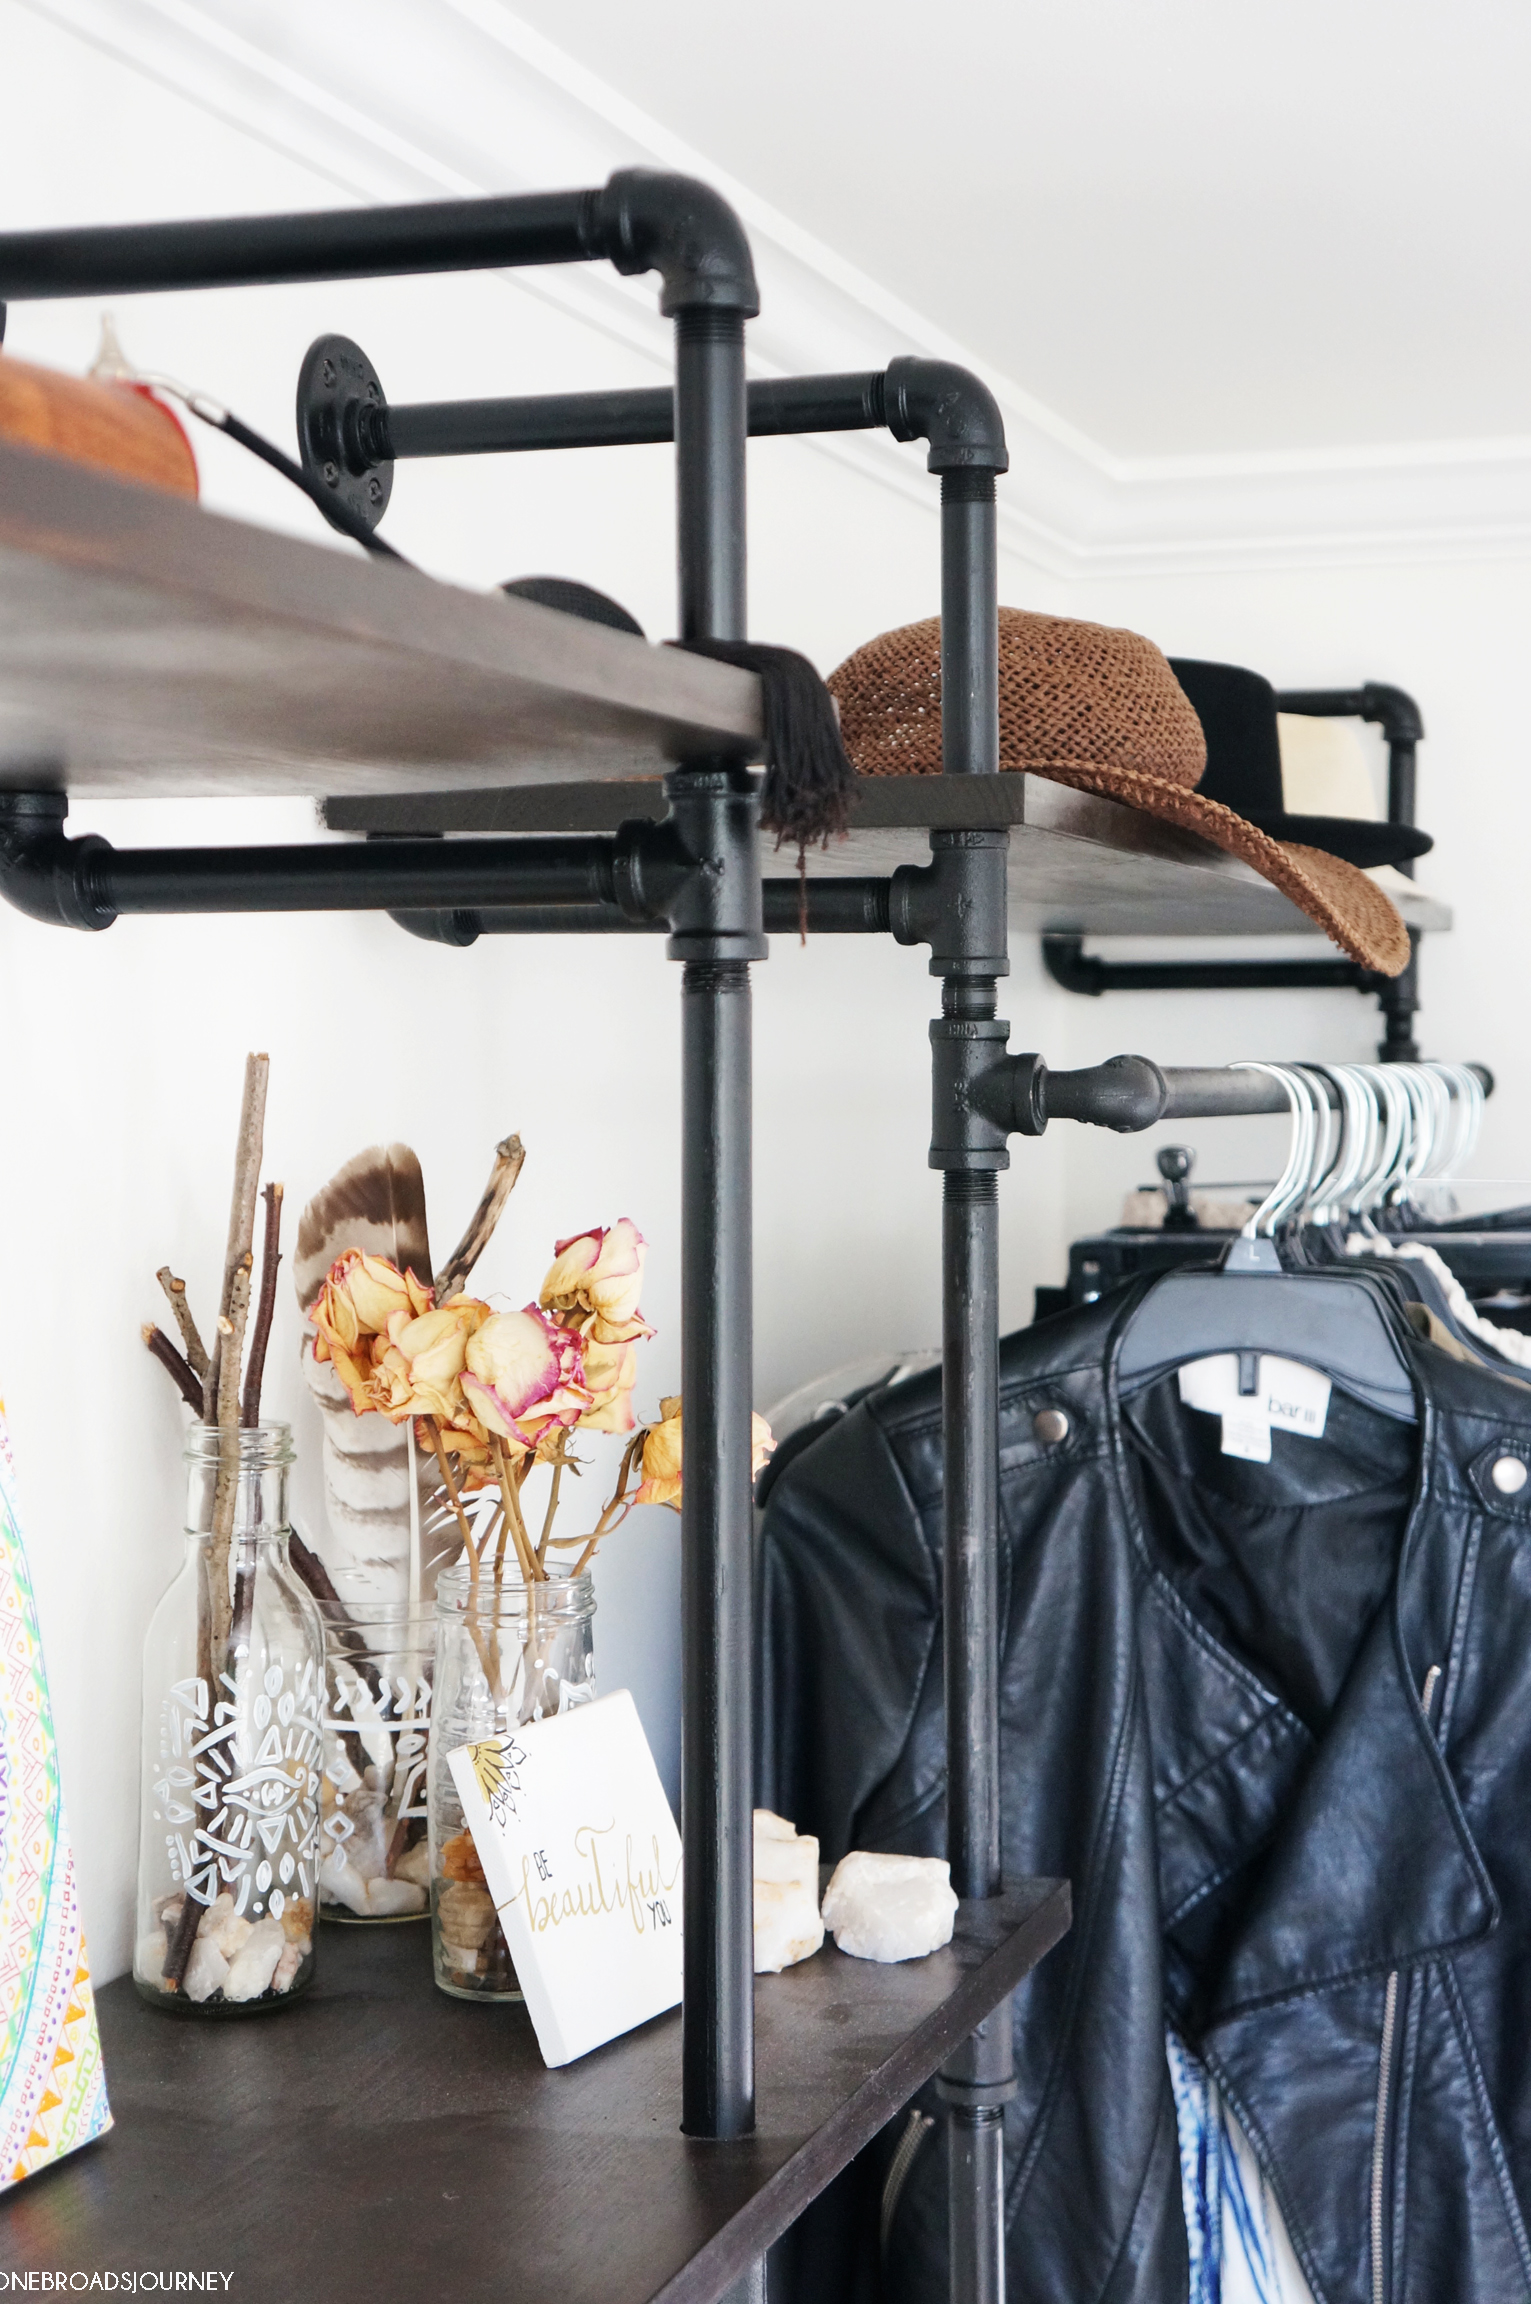
90 Degree Street Elbow: Anywhere you need to connect a pipe and 90 degree the turn or from a Tee to protrude another pipe further outward. If you look at picture 21 (same as at the top) you’ll see it used at the back to hold the shelf up and in the front to bring the clothes hanging pipe another couple inches out from the wall.
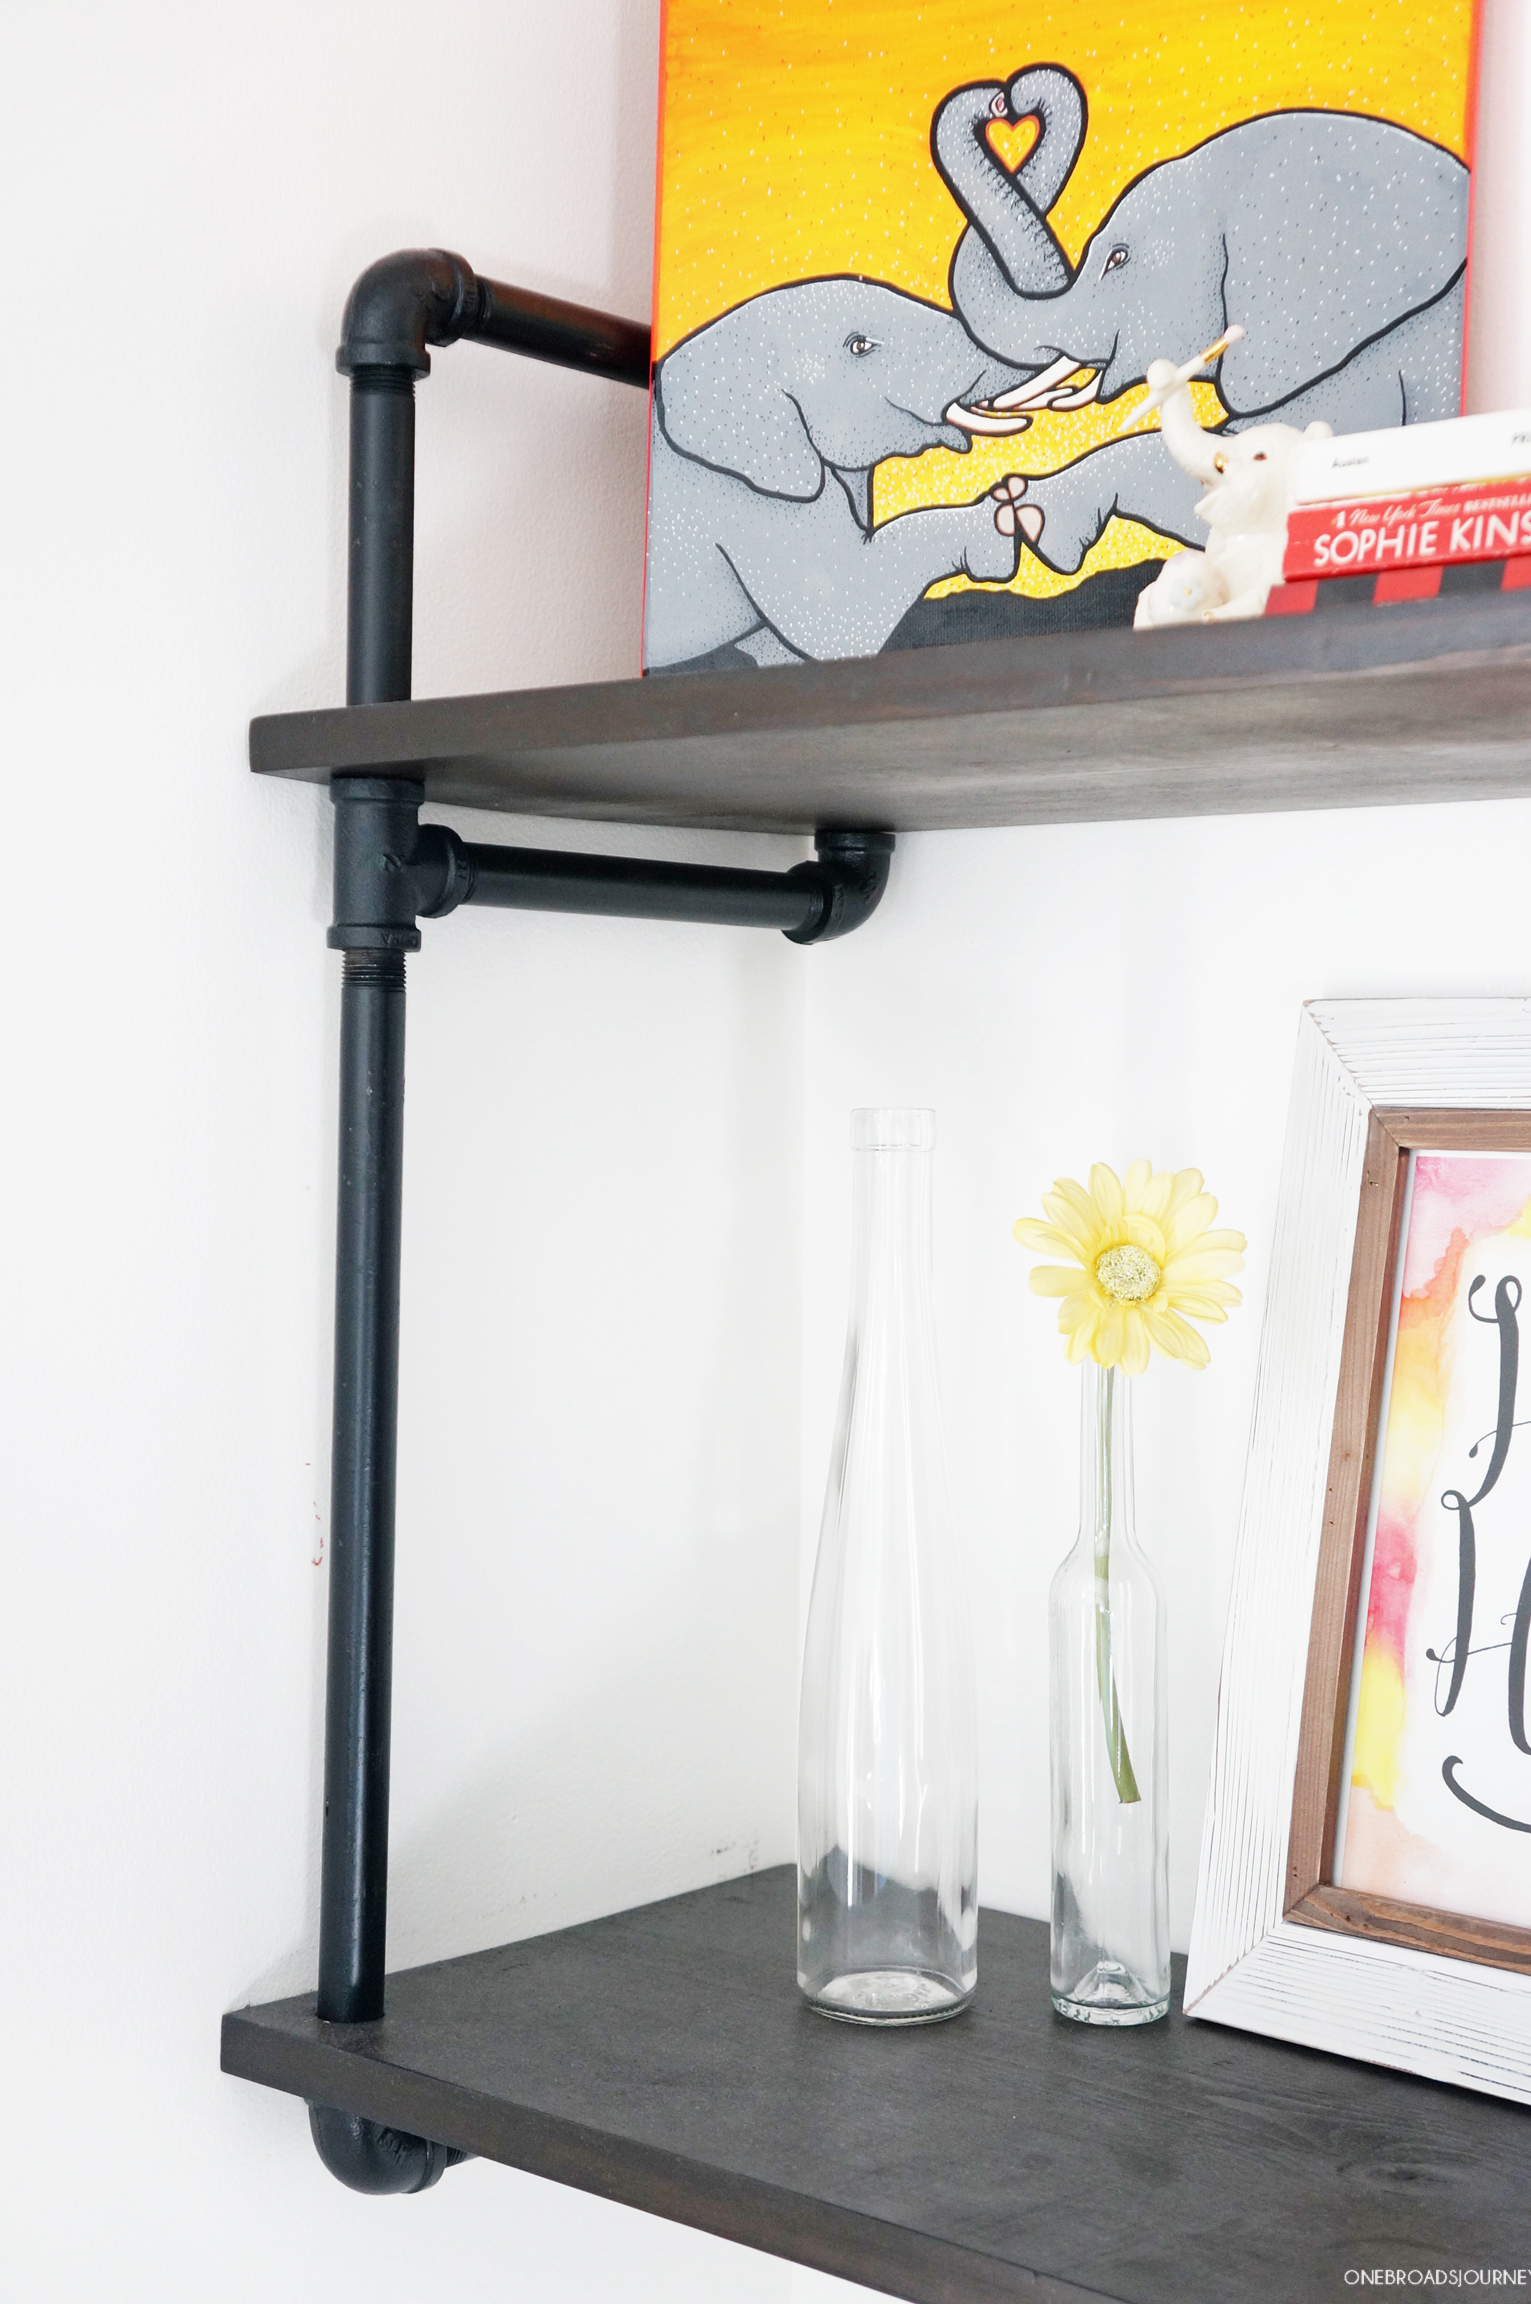
Elbow: Anywhere you need to curve the pipe from going up vertical to horizontal or the other way around
Nipple: It’s okay you can laugh, I made nipple jokes through the entire building process. These are used when you need to add extra length or spacing in a section or to connect to odd pieces together. Look again at the top photo you can see it used between two Tee’s to create the same length on the clothes hanging side as the left shelves side.
Threaded Tee: These we used anywhere we had a shelf. While the top and bottom connect the pipes upward, the 3rd opening provided piping from the front of the shelf back to the wall for support.
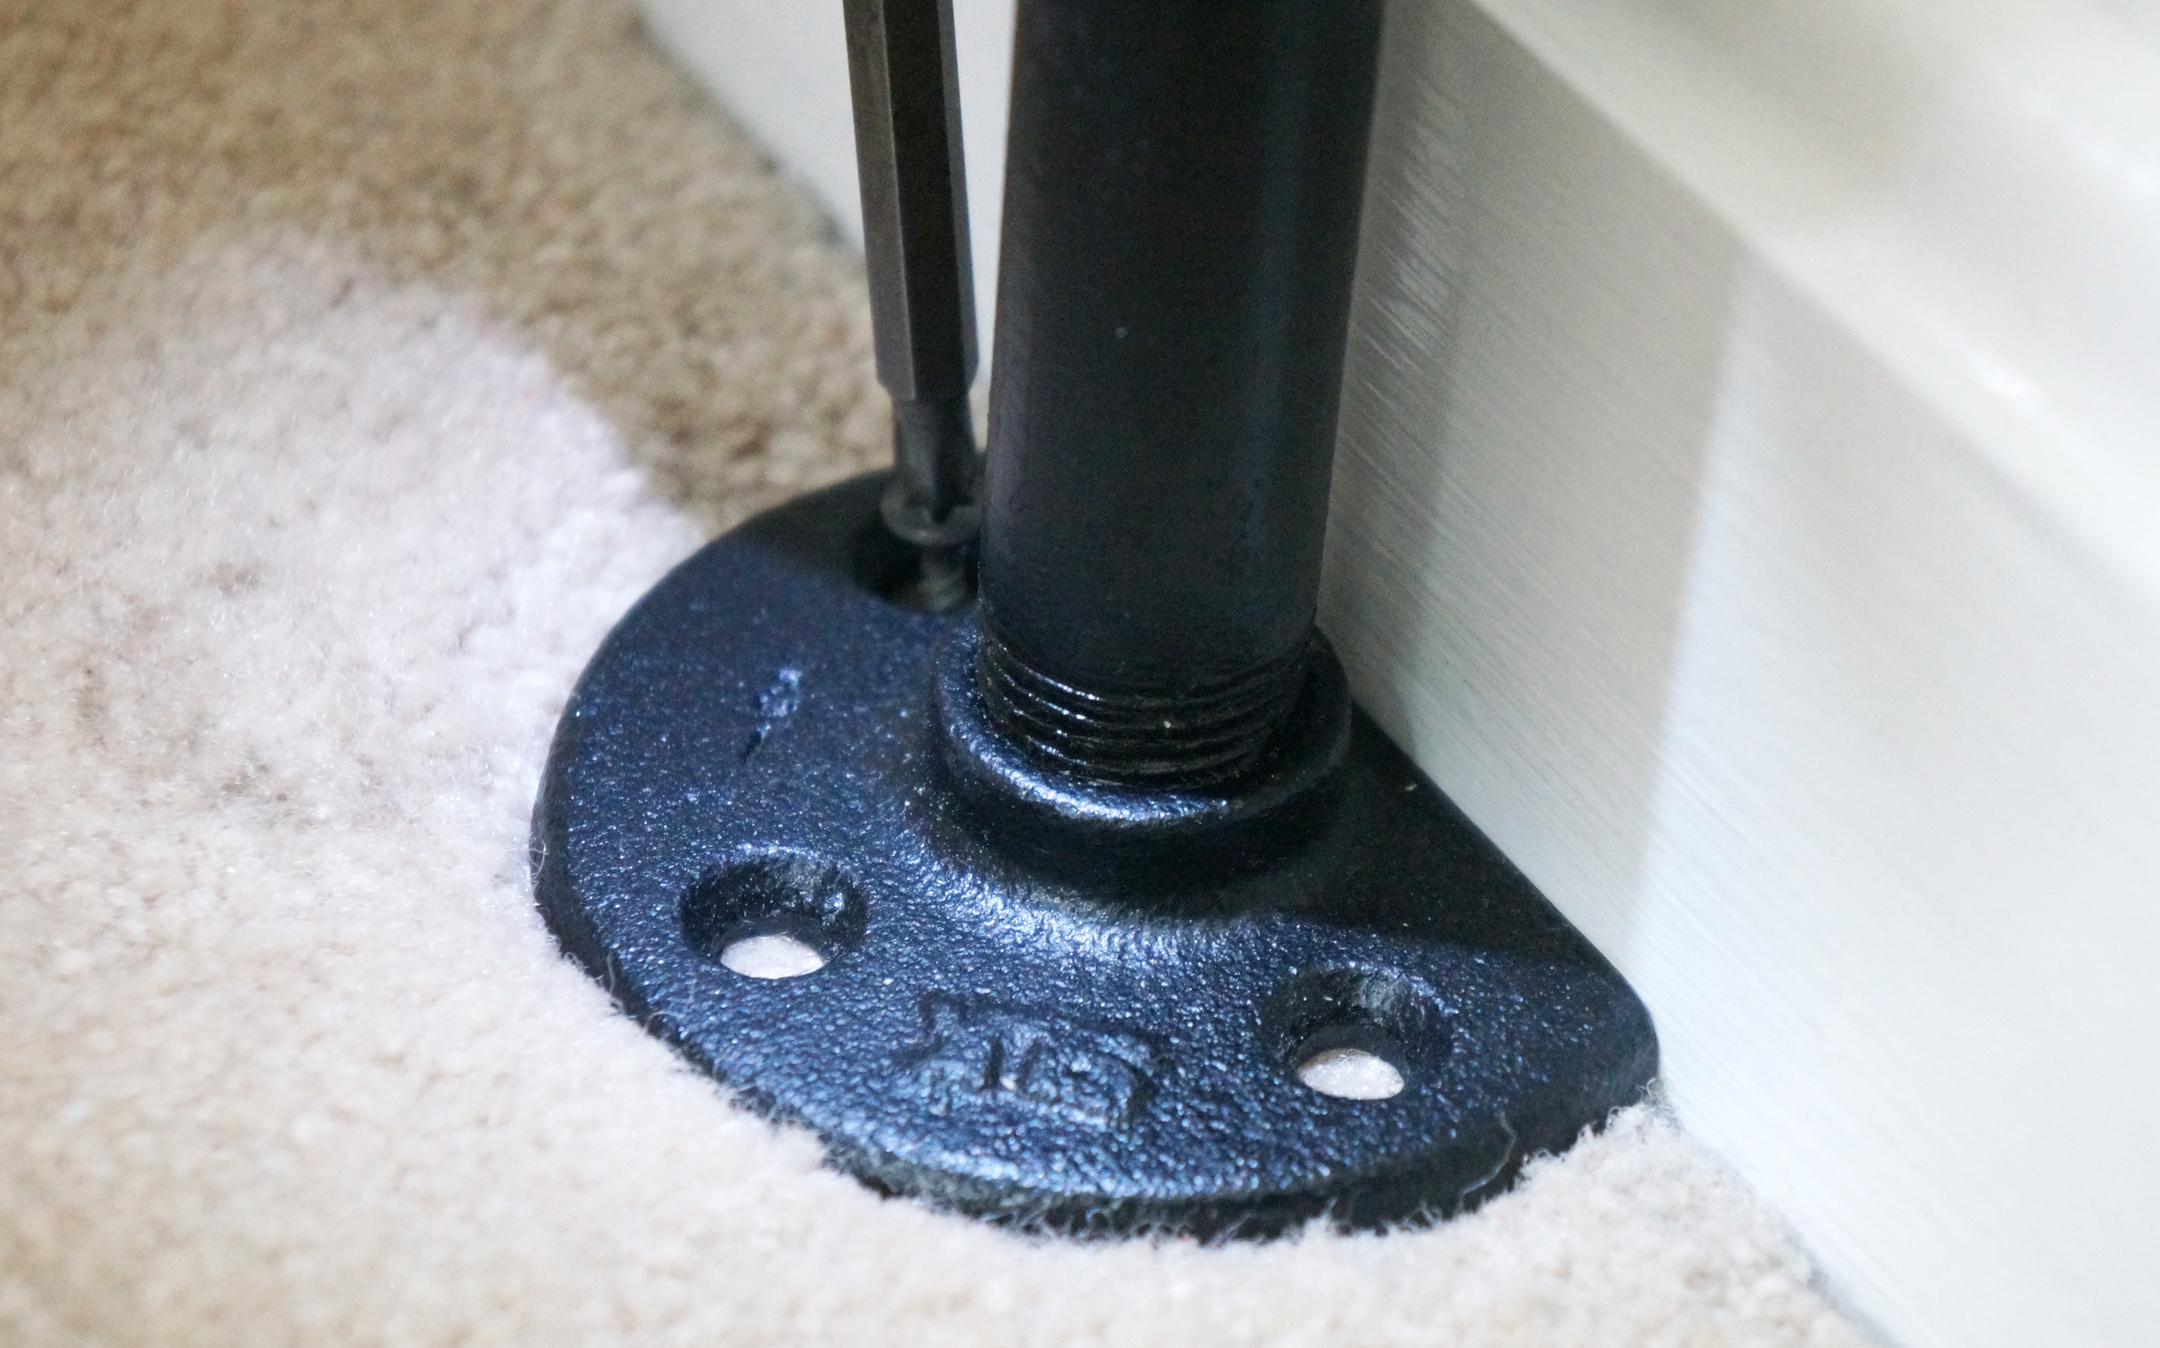
Floor Flange: These connect your shelves to the wall and the floor. In this case we used them to secure to the wall across the entire top (The extra above piping was mostly for ascetics and not necessary for structure) and to screw the two bottom pipes down into the floor for security.
Cap: When planning out the design, I knew I wanted a replacement for the table that used to be next to my bed. So we crafted a longer board, double the width of the other shelves, for next to the bed. With the weight that would be on the front we needed to secure the back so the long pipes on bottom come up through the back of the shelves with nipples and capped to hold it down.
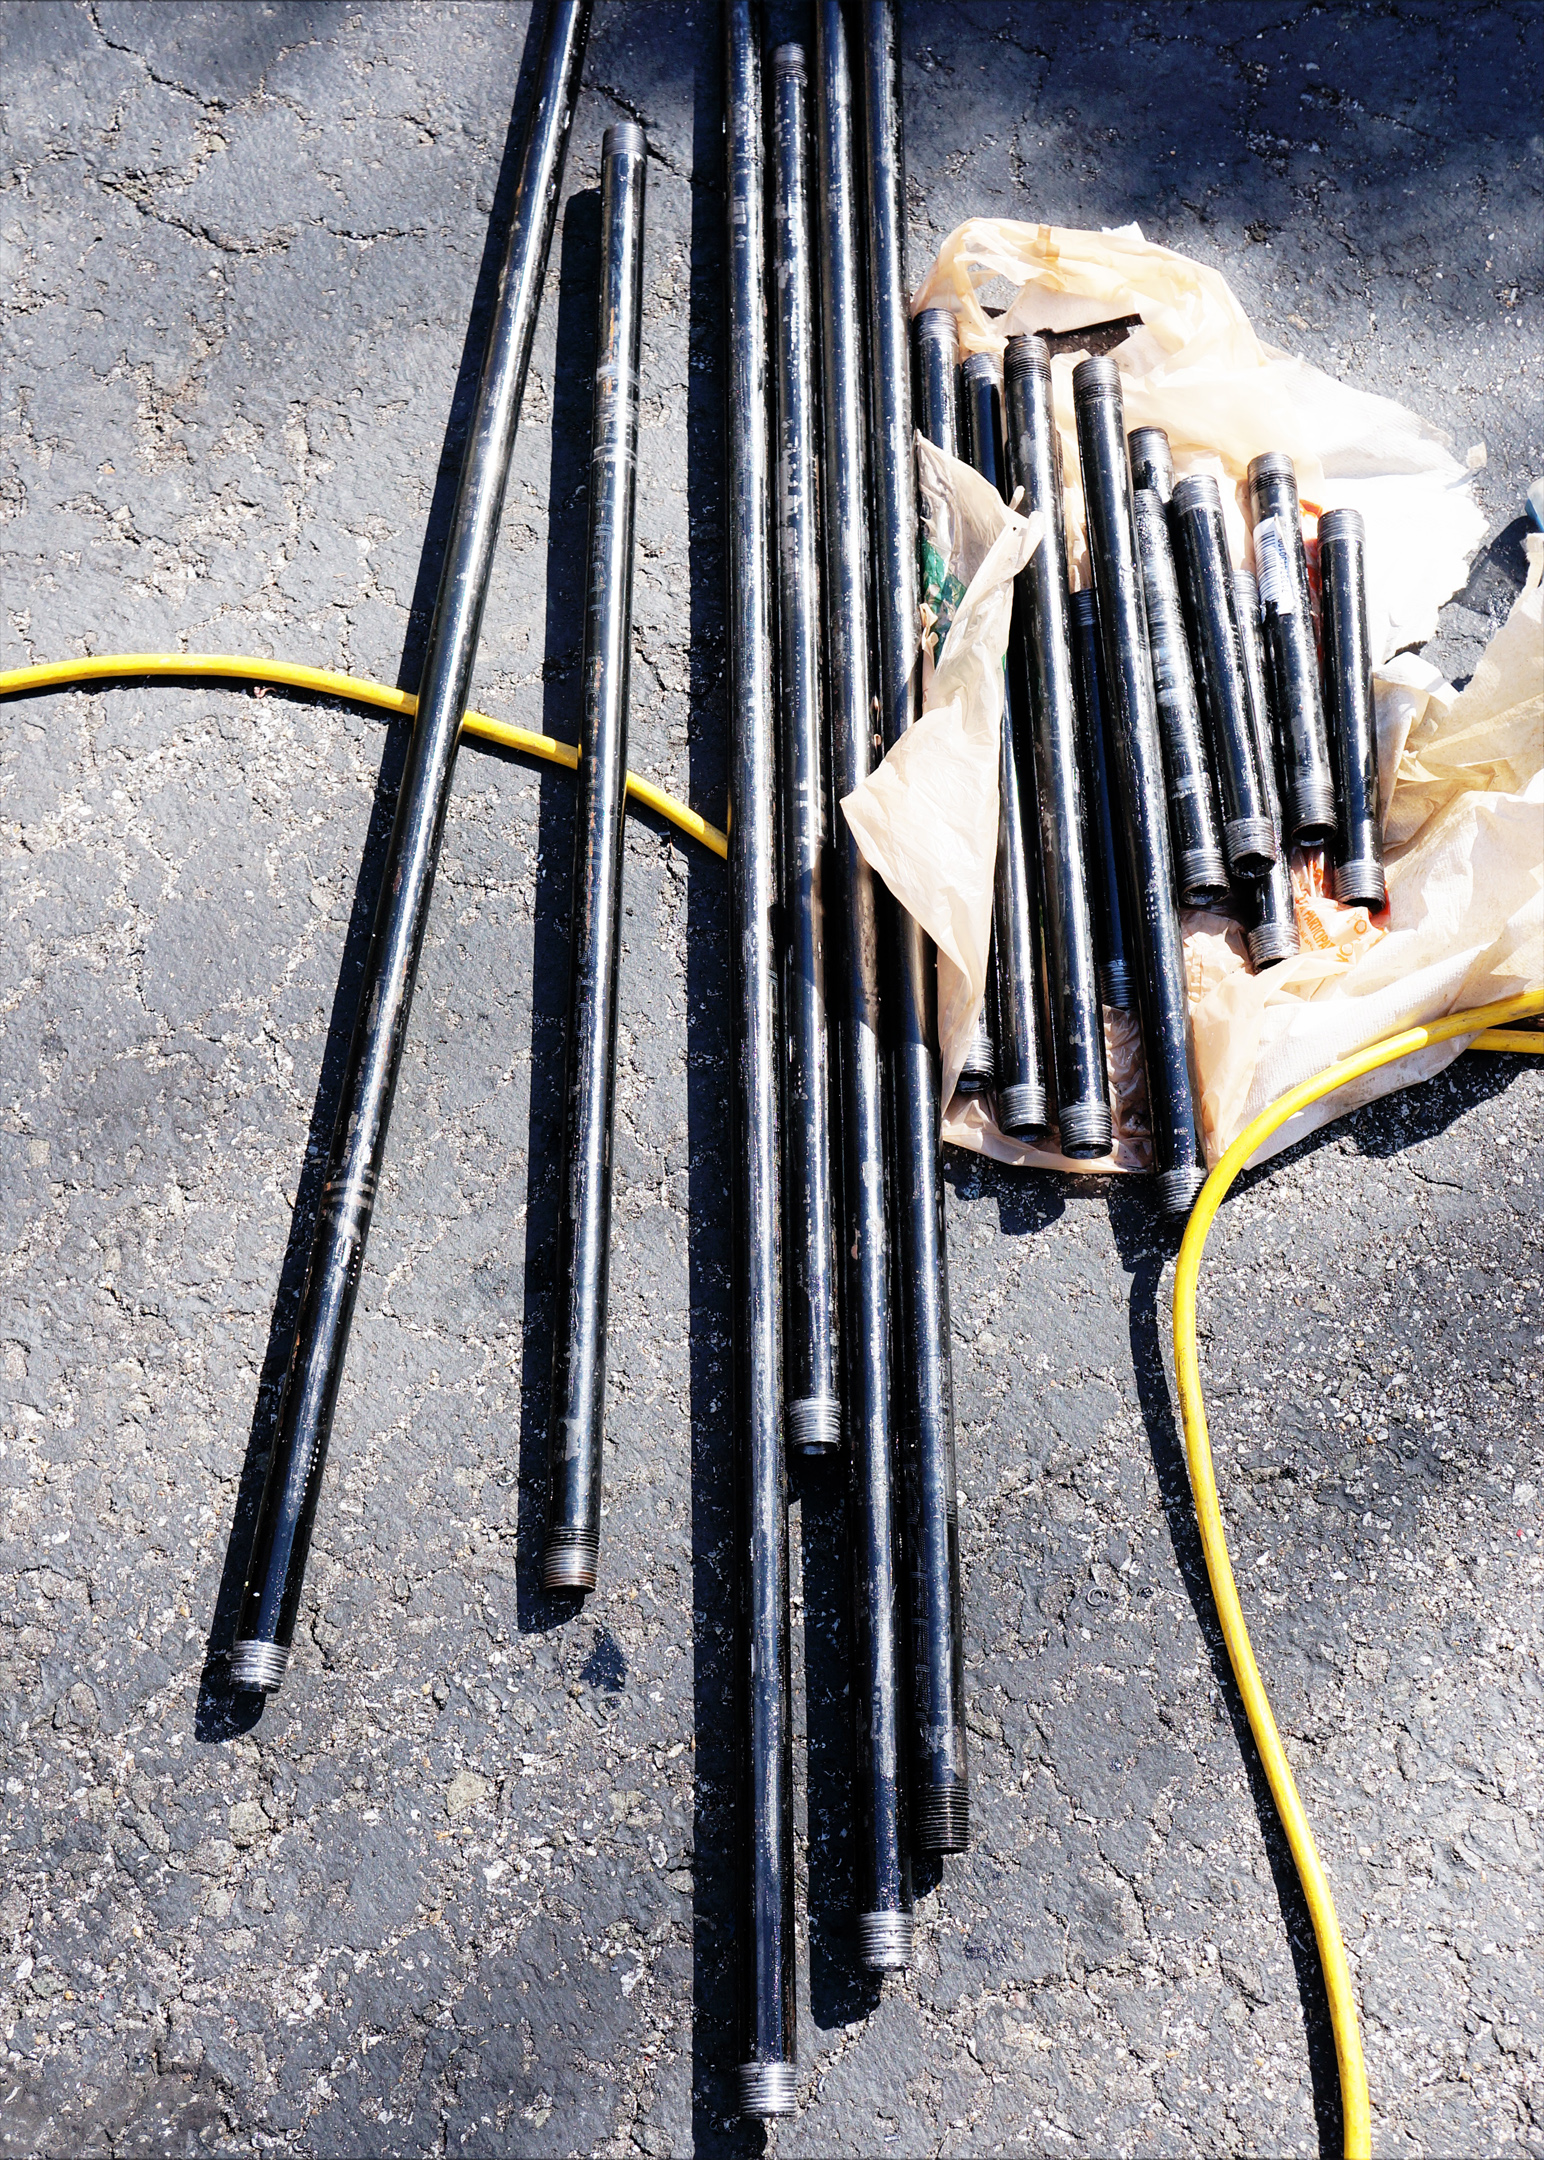
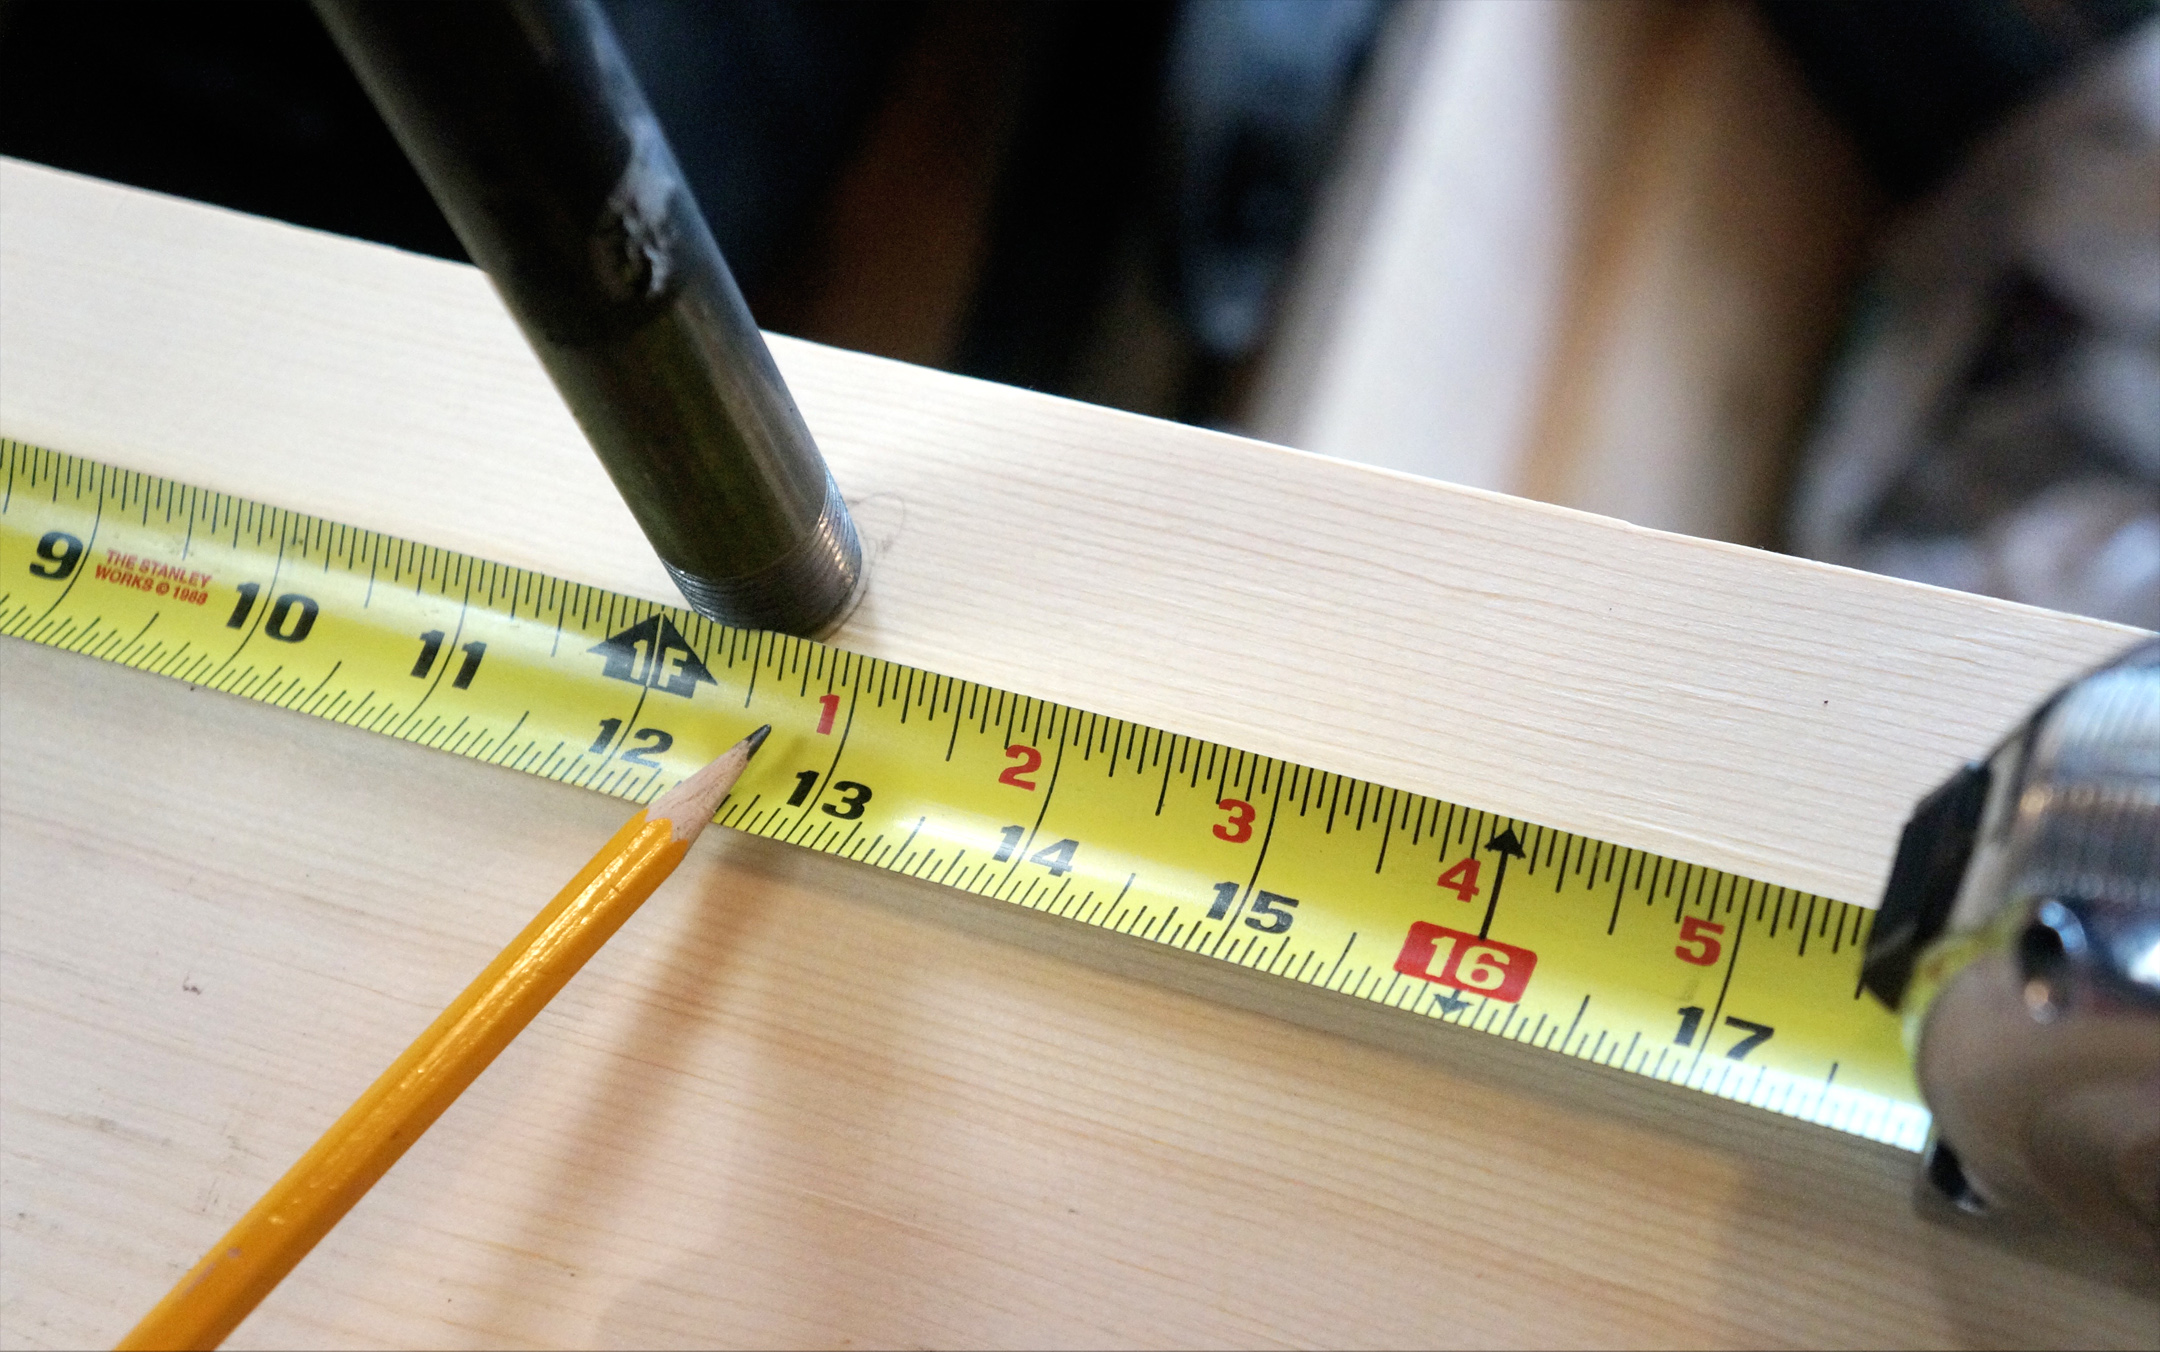
3. If you’re lucky you can skip this step, but when we picked up our pipes from Home Depot we had very specific measurements and the pipes needed to be cut. Unfortunately the pipe cutting machine worked but the threader did not. A threader is what creates that swirl on the end of the pipe that allows you to screw it into the other pieces. We had to rent a threader and do it ourselves. If you can avoid this step DO IT! It’s a lot of work, a lot of time, and a lot of oil and frustration. Here’s a preview…

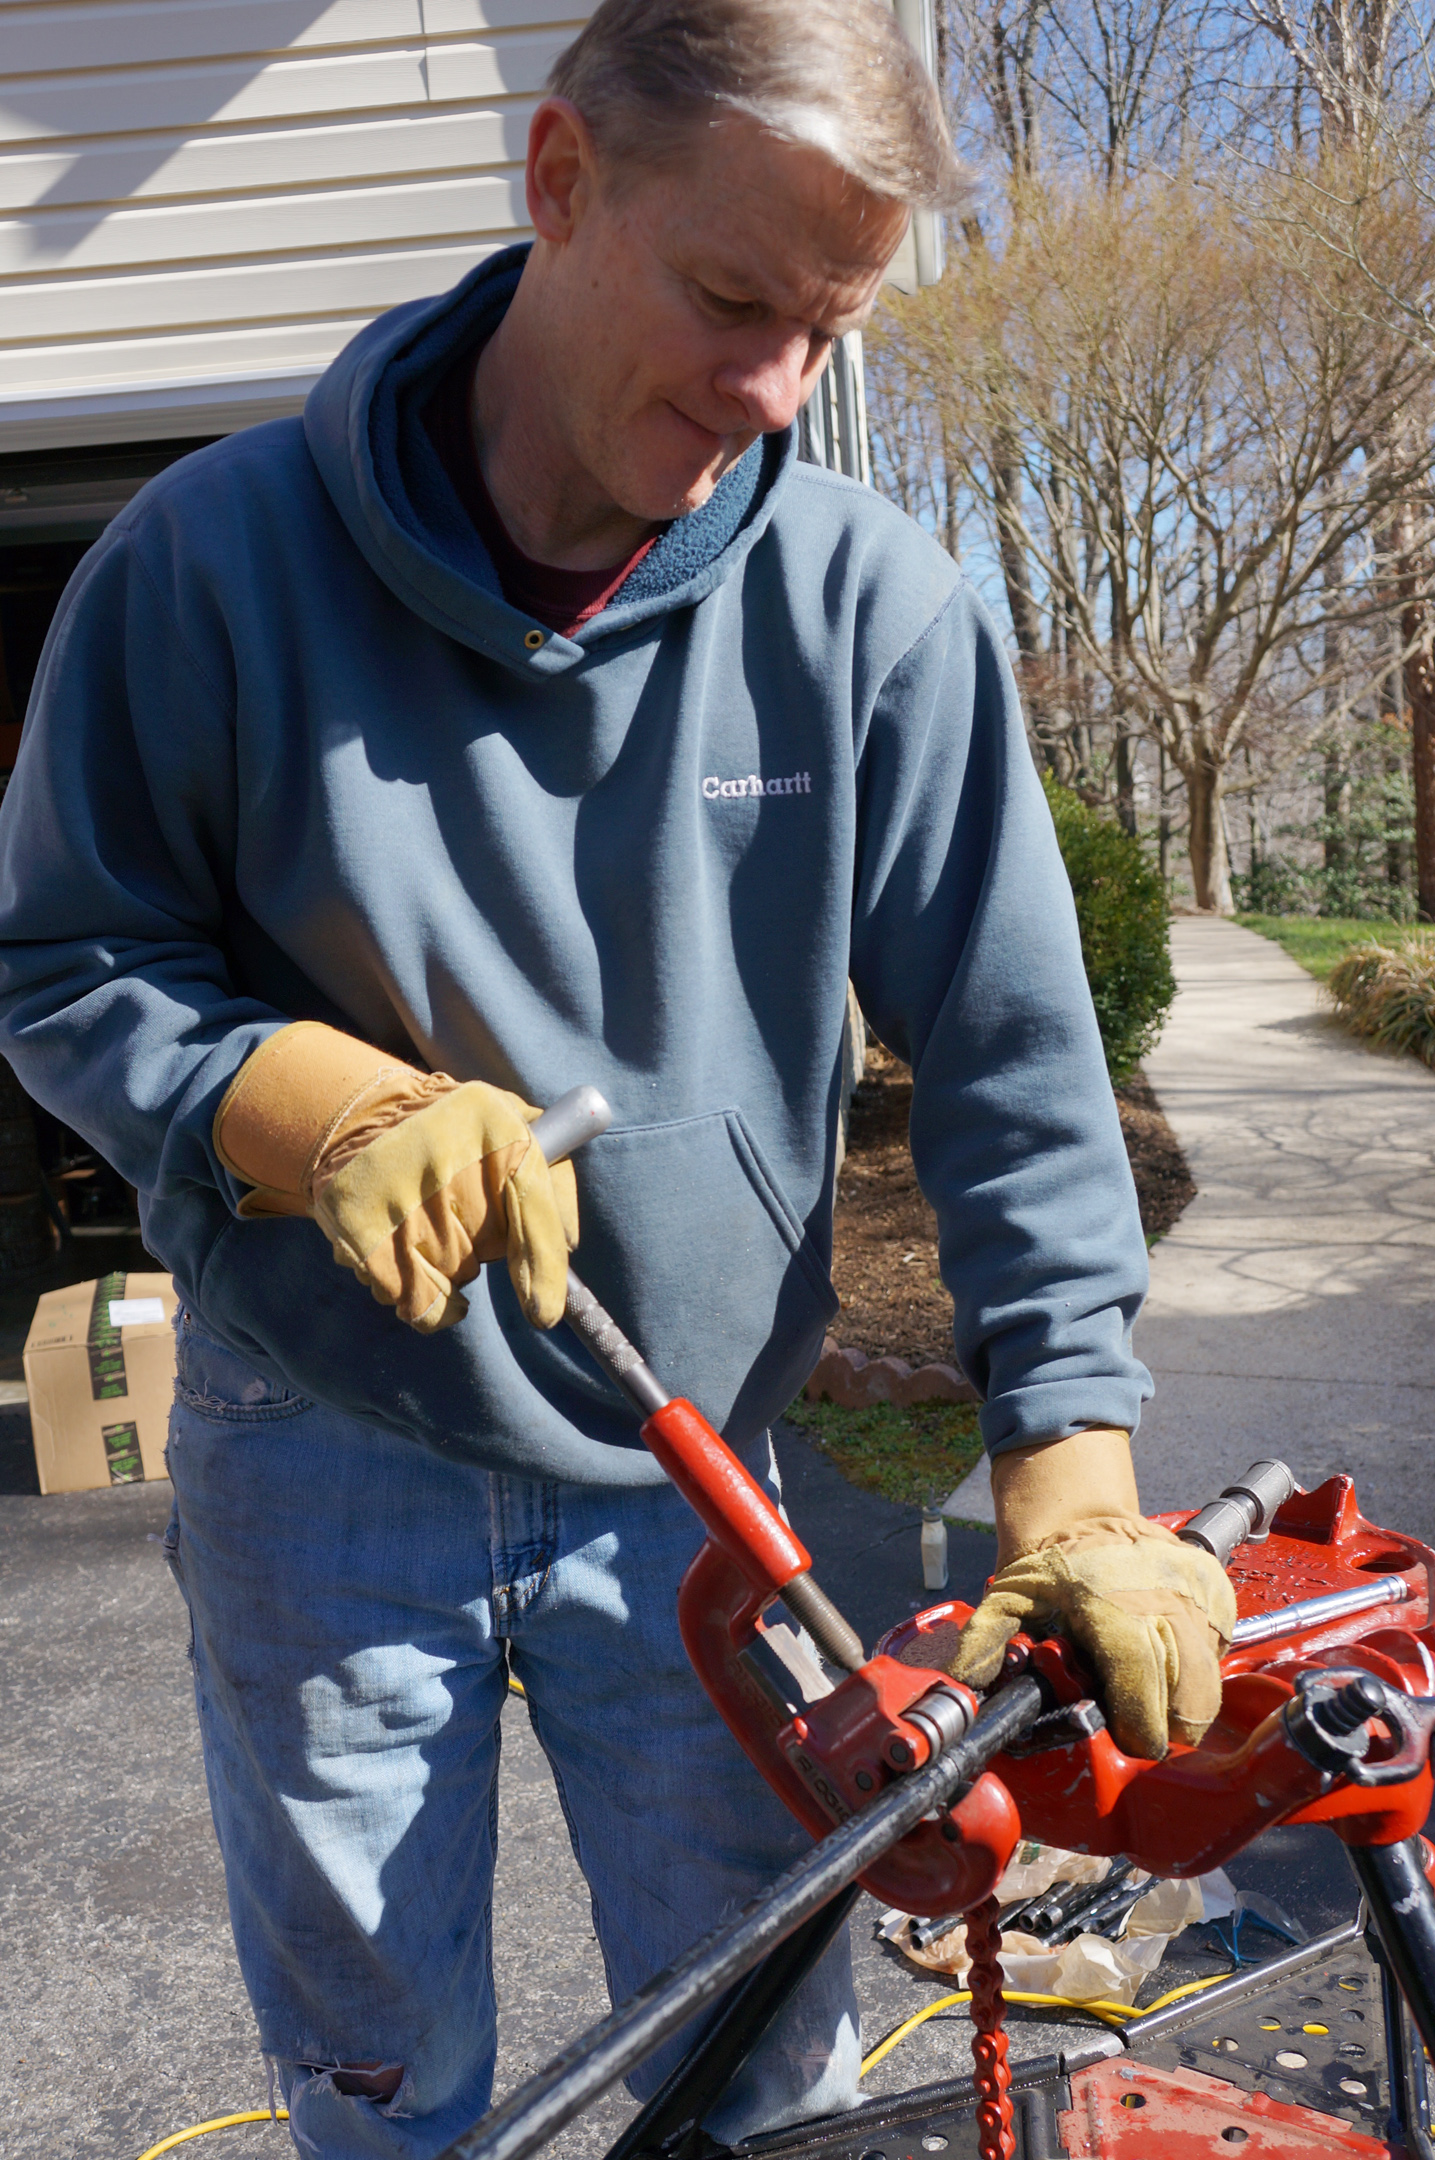
My Hero in the flesh and the only reason these shelves exist.
4. Wash the pipes and all parts with degreaser. Let dry completely, preferably overnight.
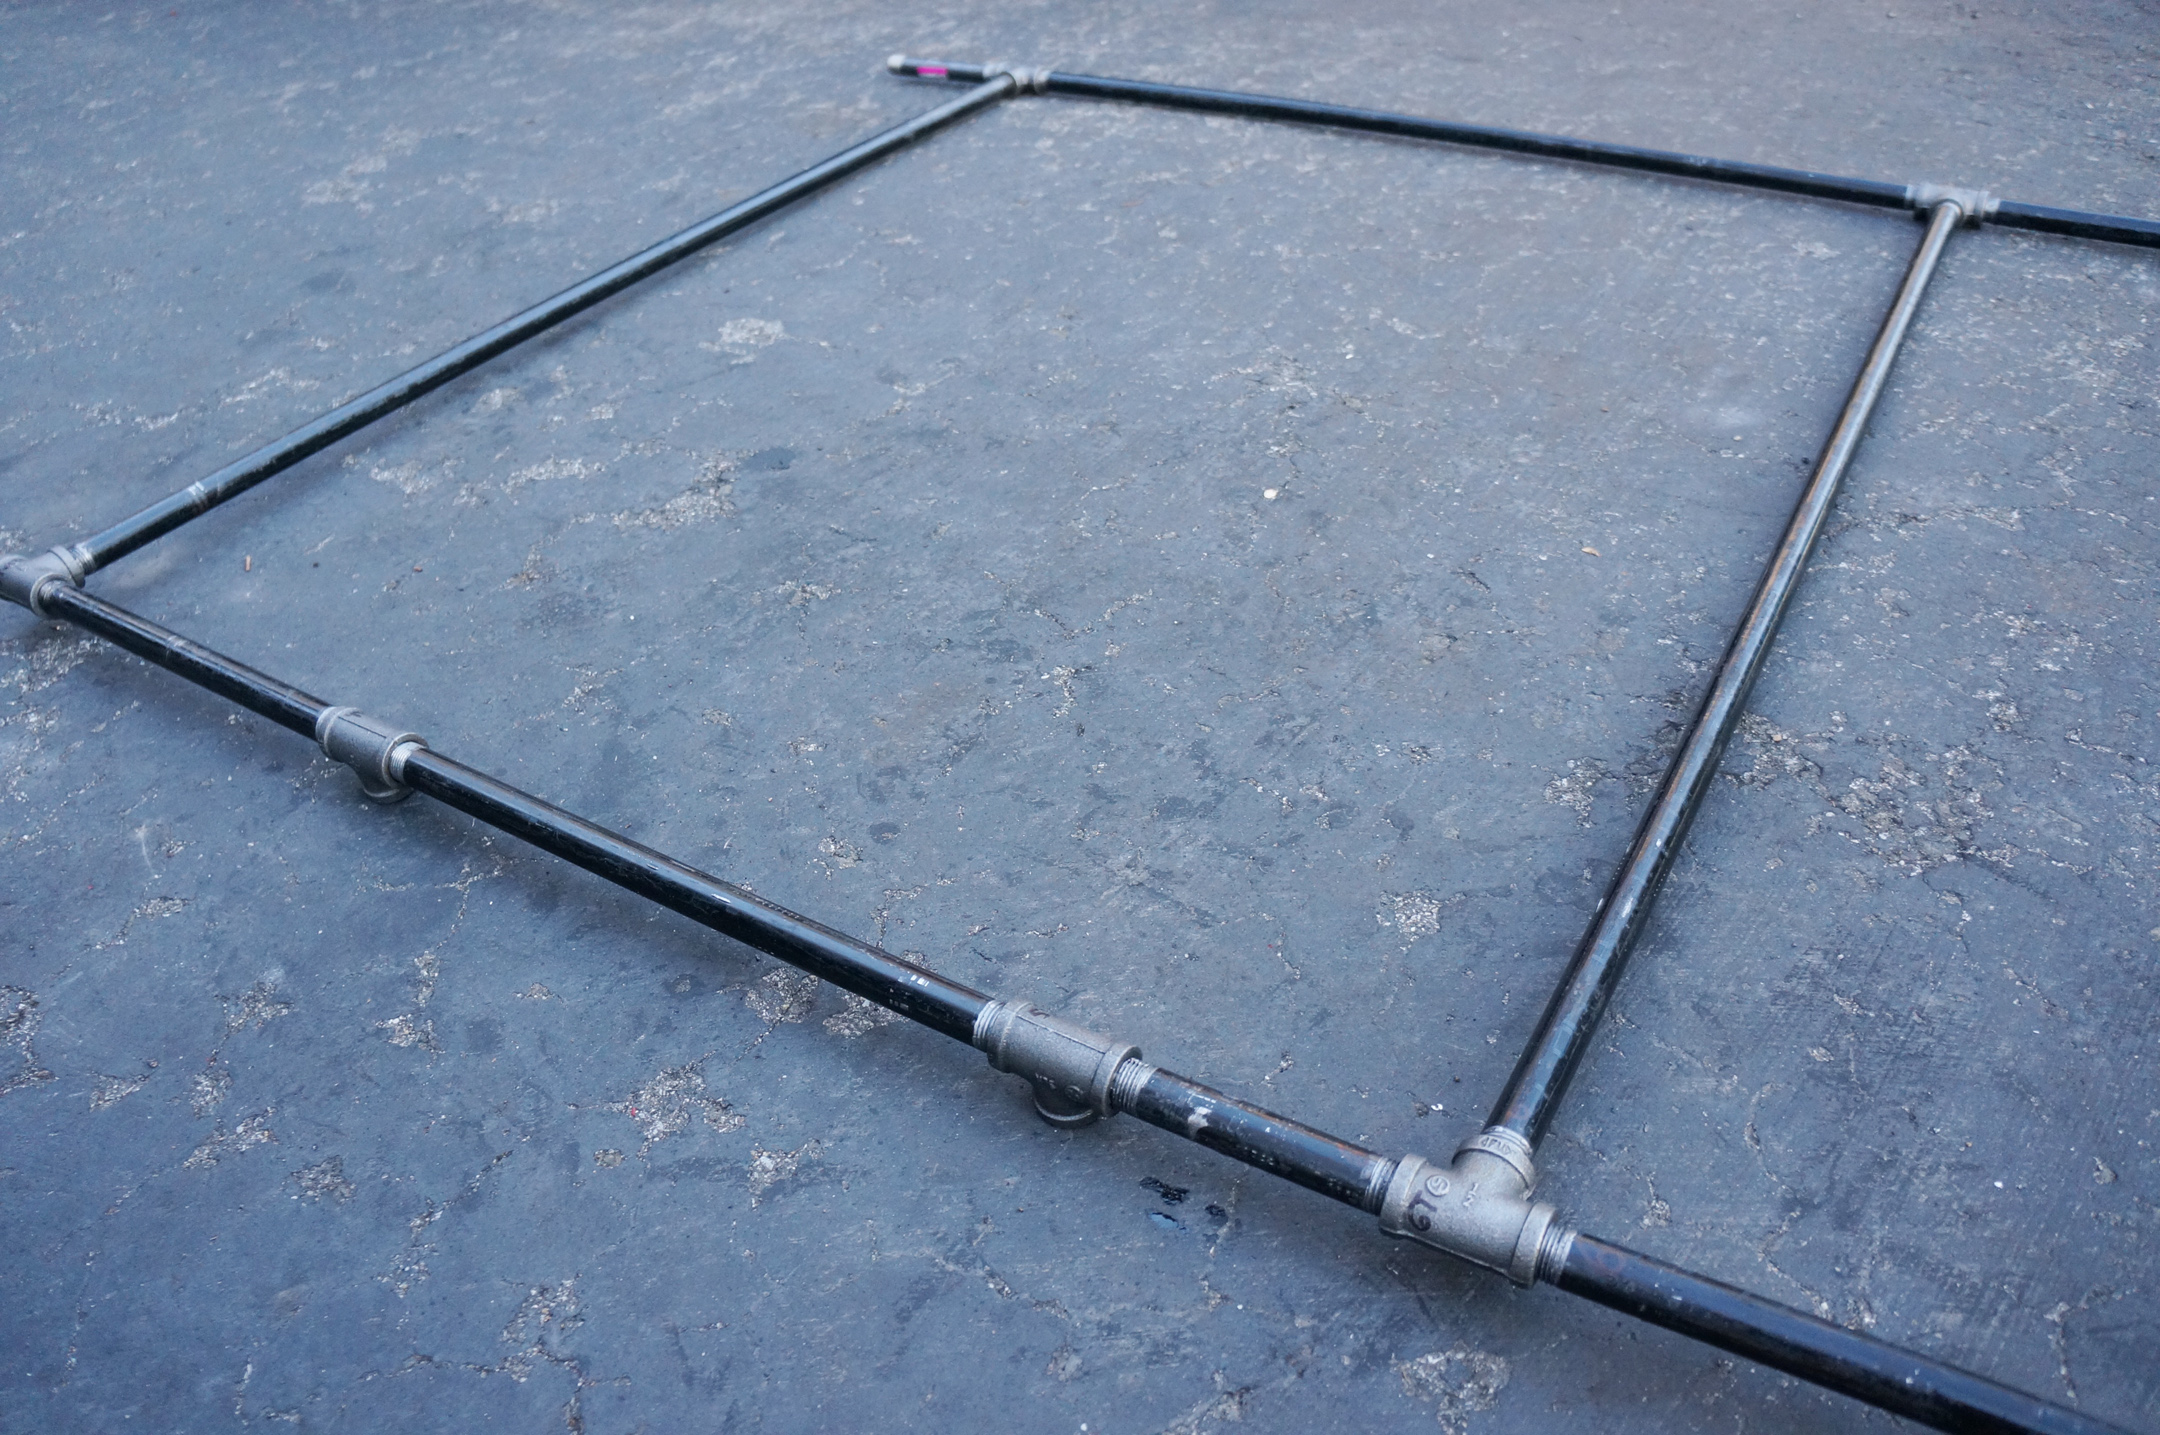
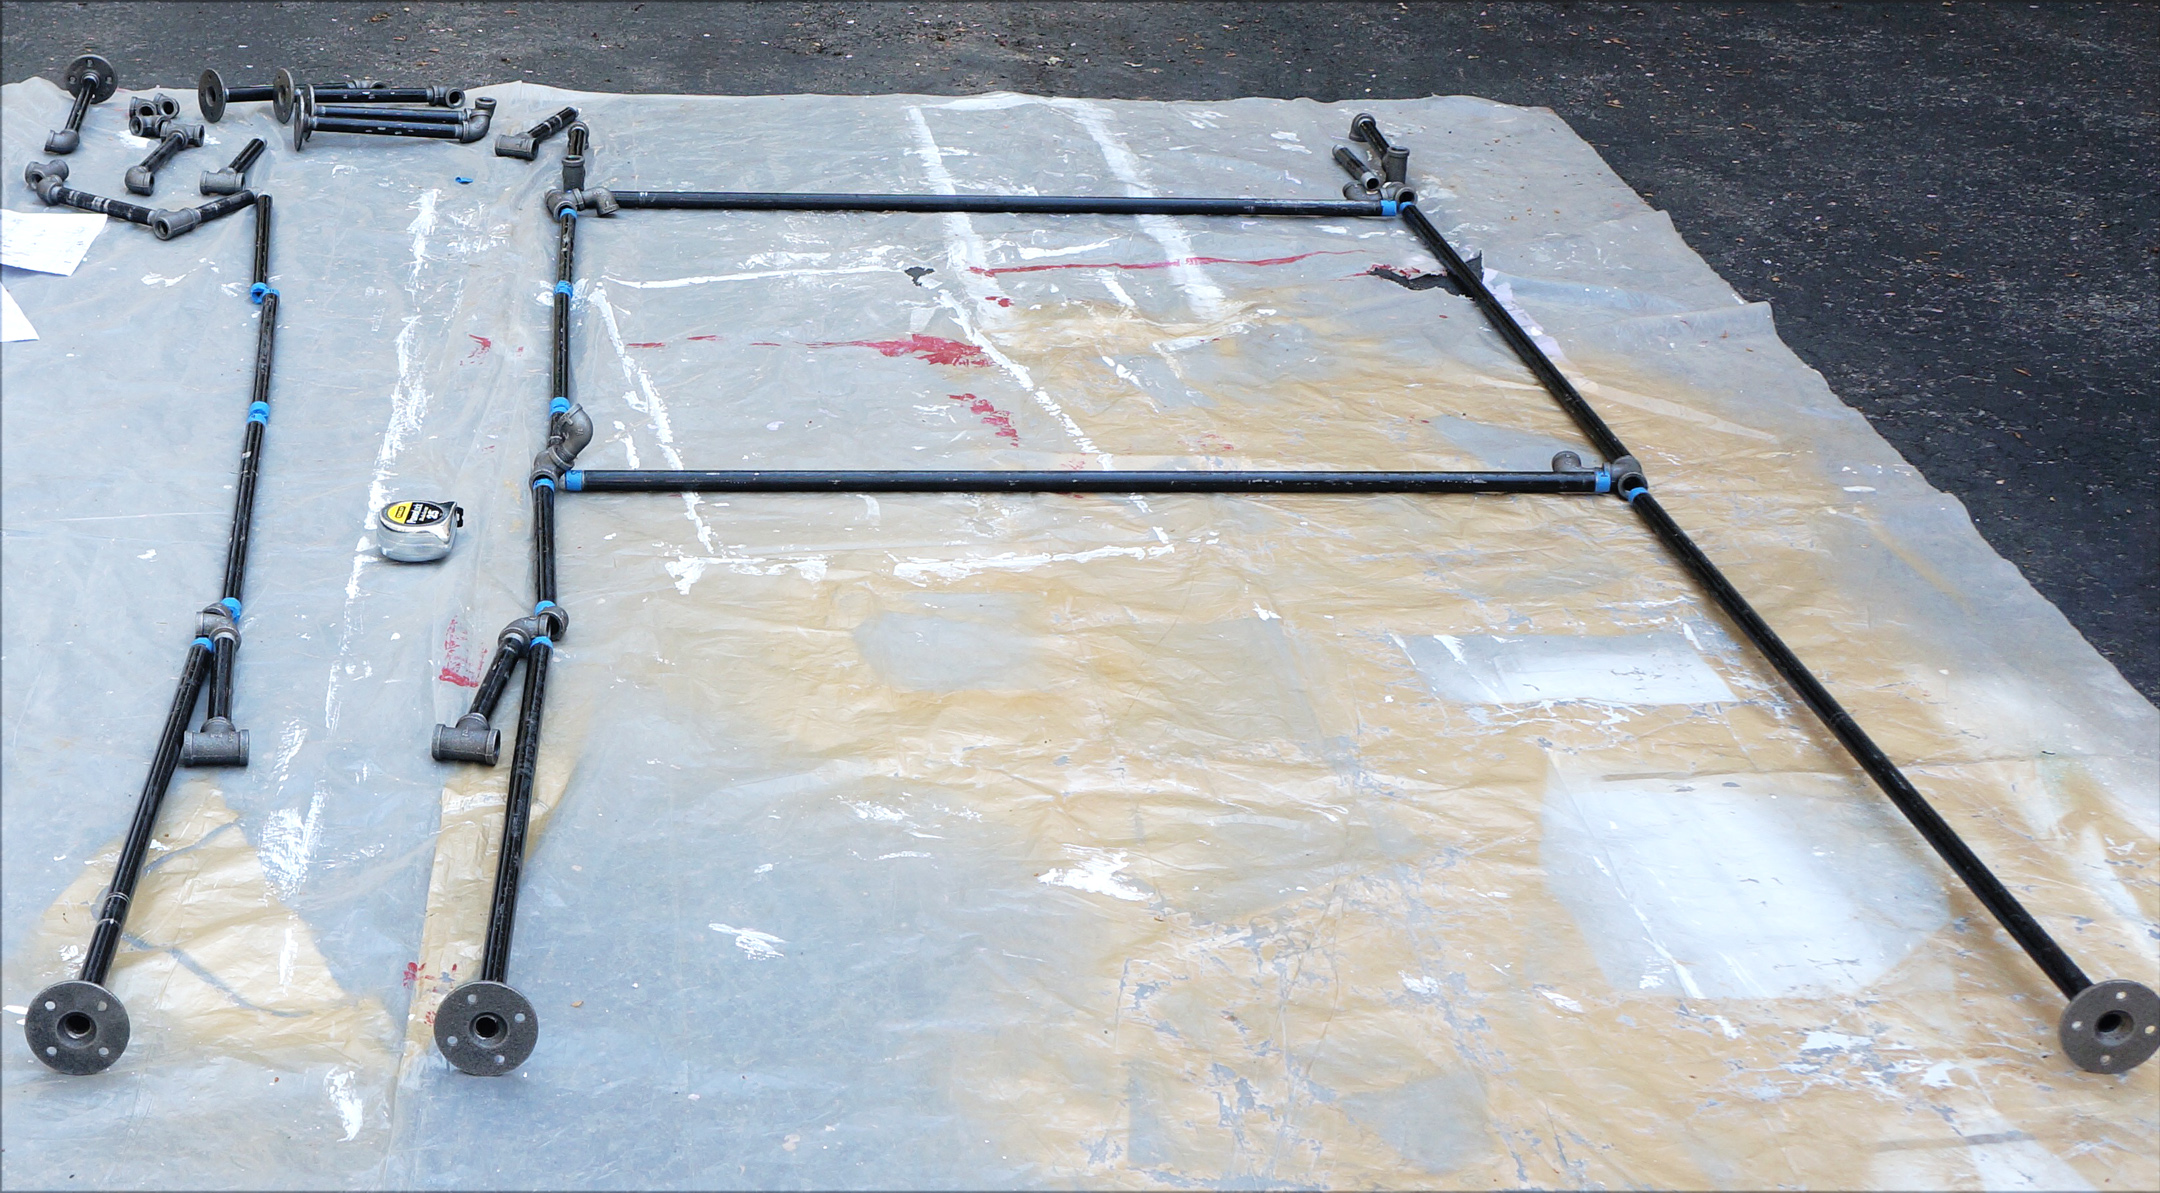
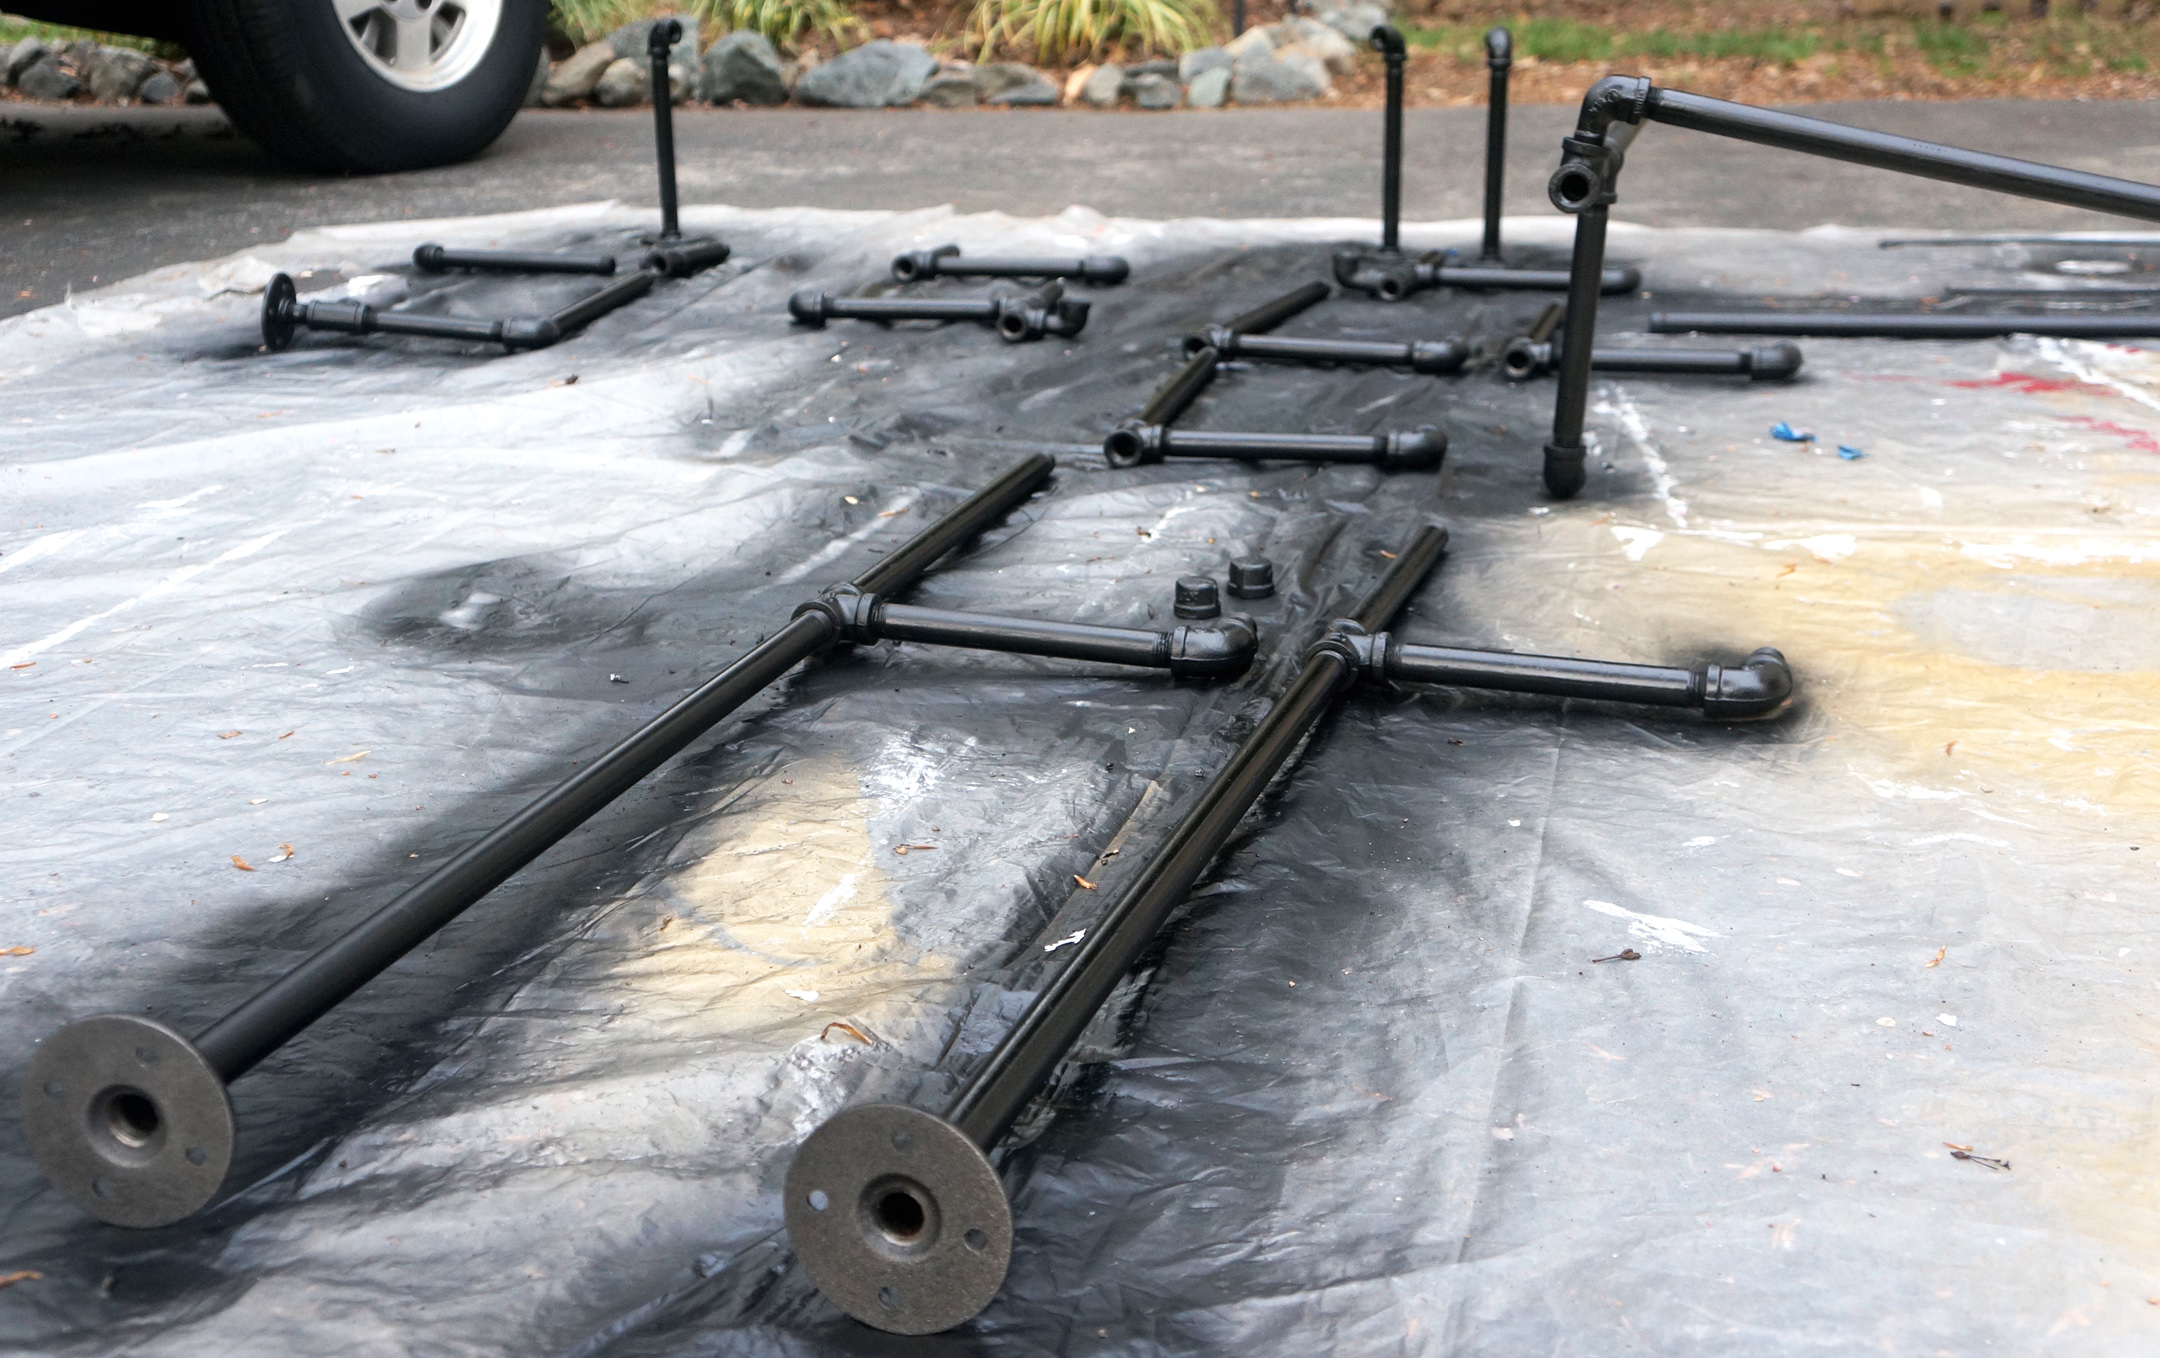
5. Start to assemble your shelves. Laying the design out flat is a great way to see what you’re working with. Once layed out you can color them if you choose, I spray painted mine black.
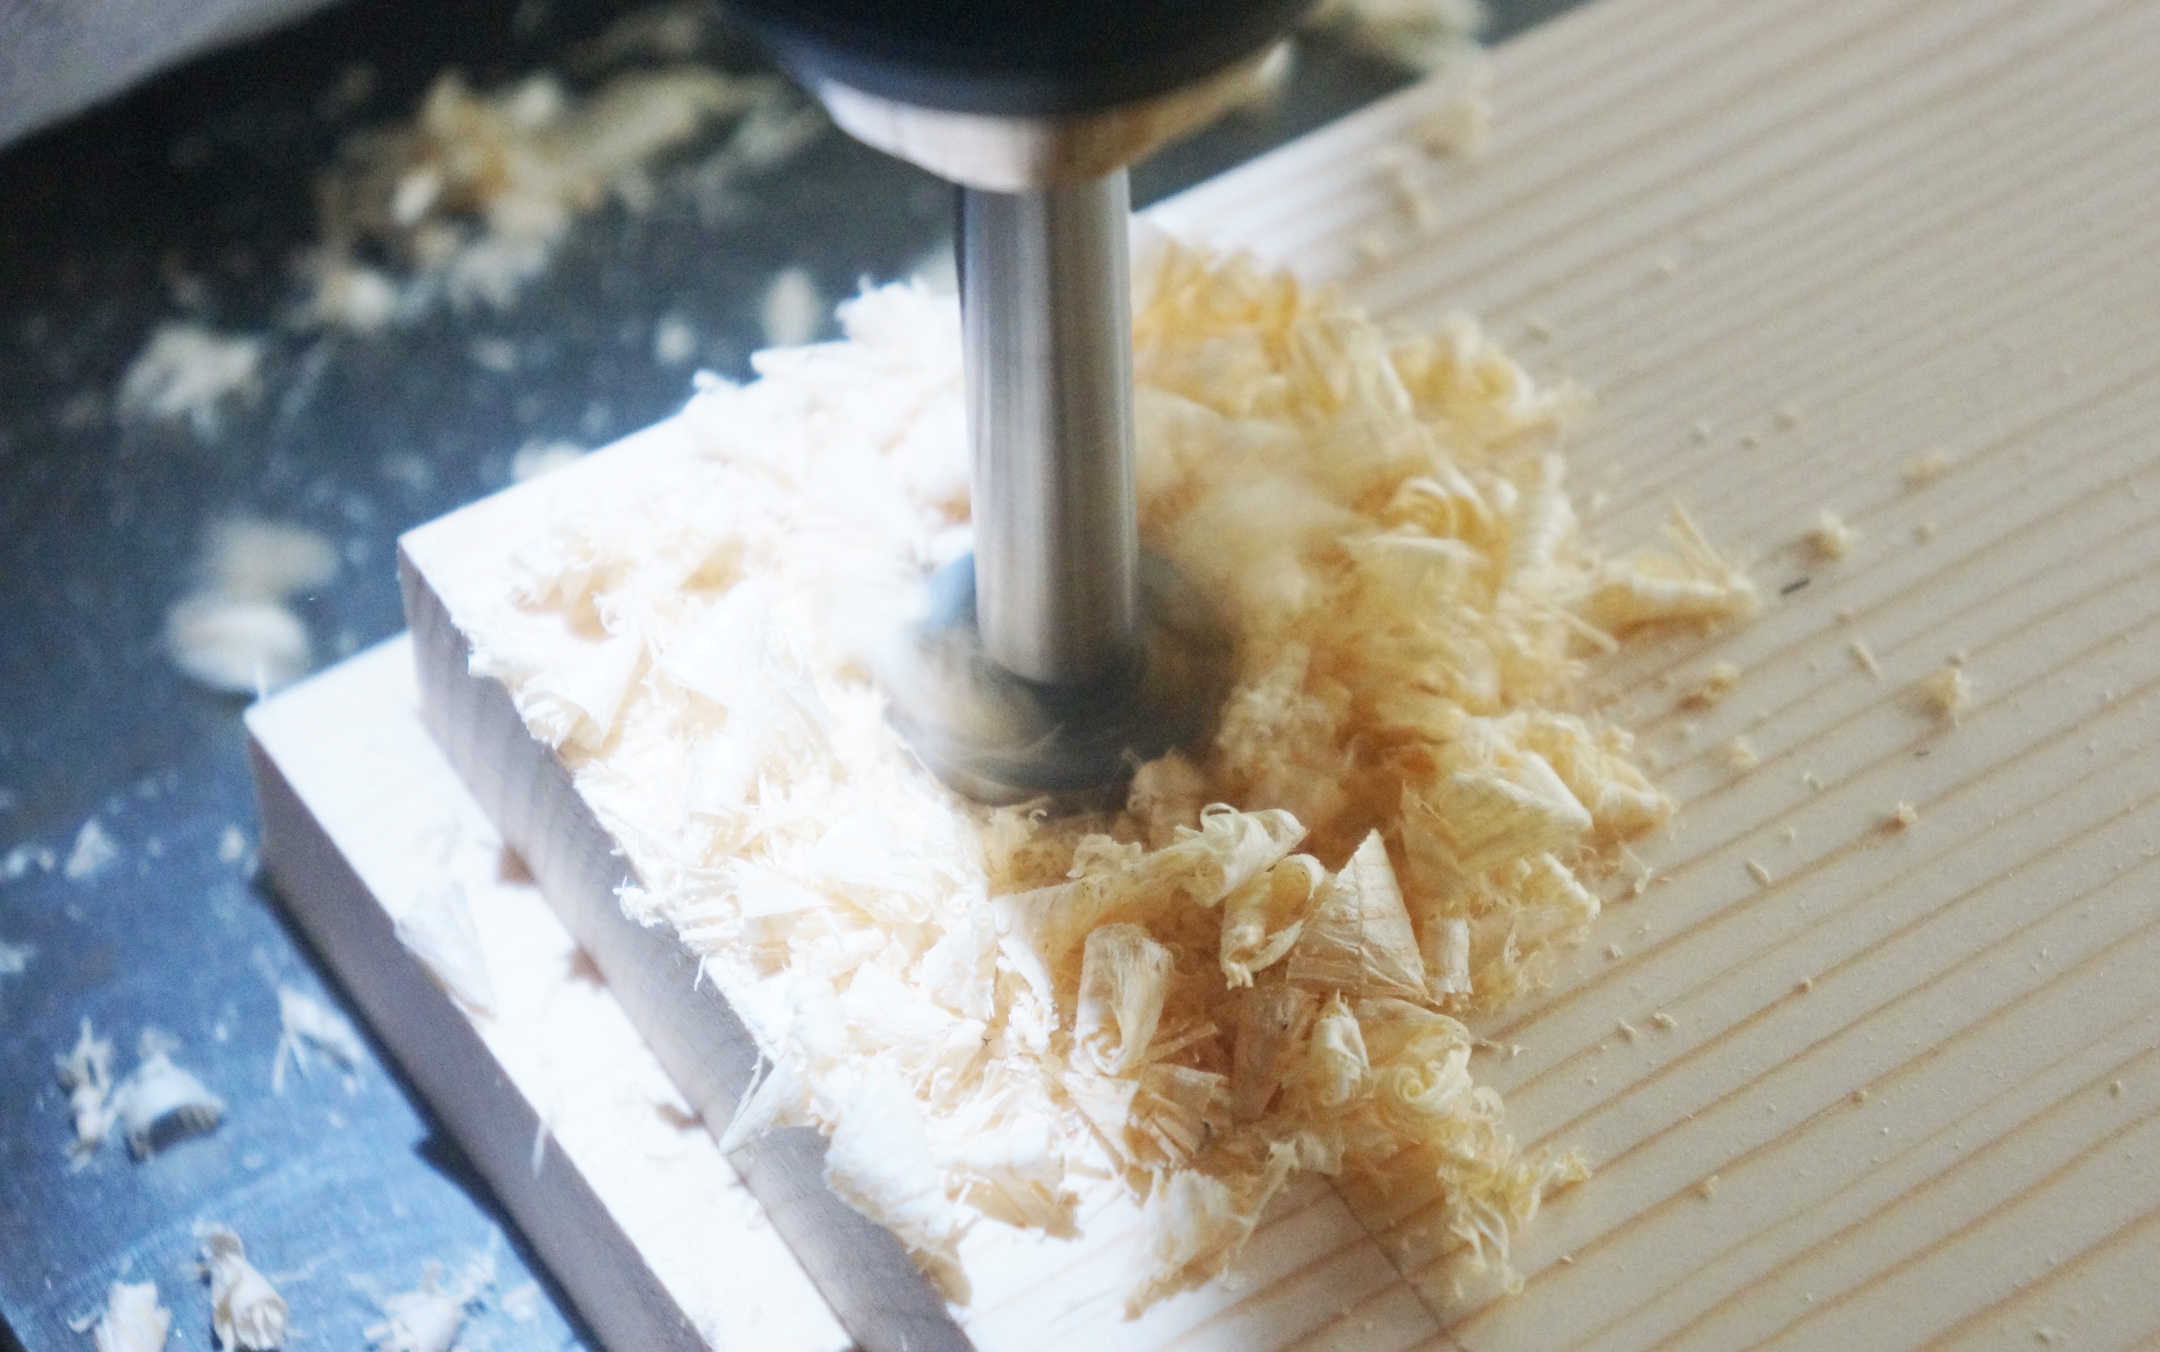
6. While the spray paint layers dry, start on your shelves. We used 1 inch thick, 12in wide pine boards cut to the length we need. In order to secure them we had the piping go up through each of the shelves and secured underneath with a pipe from front to back. In order to do you’ll need to drill holes in the boards where your piping will come up through. This all depends on your design but remember not to drill to close to the edge or it will snap.
7. To add a wider shelf, use wood glue to double the width.

8. Use a Wood Boring Bit drill end to create the holes. Be sure to drill straight down, any angle will make it fit odd on the pipes.
9. Begin assembly! Piece together anything you can prior to bringing it inside. This will reduce the amount of times you hit your ceiling or scratch the walls. This will probably take a few hours. The balance game of adding shelves while building up and outward is a puzzle like no other! But it’s honestly fun and very rewarding in the end.
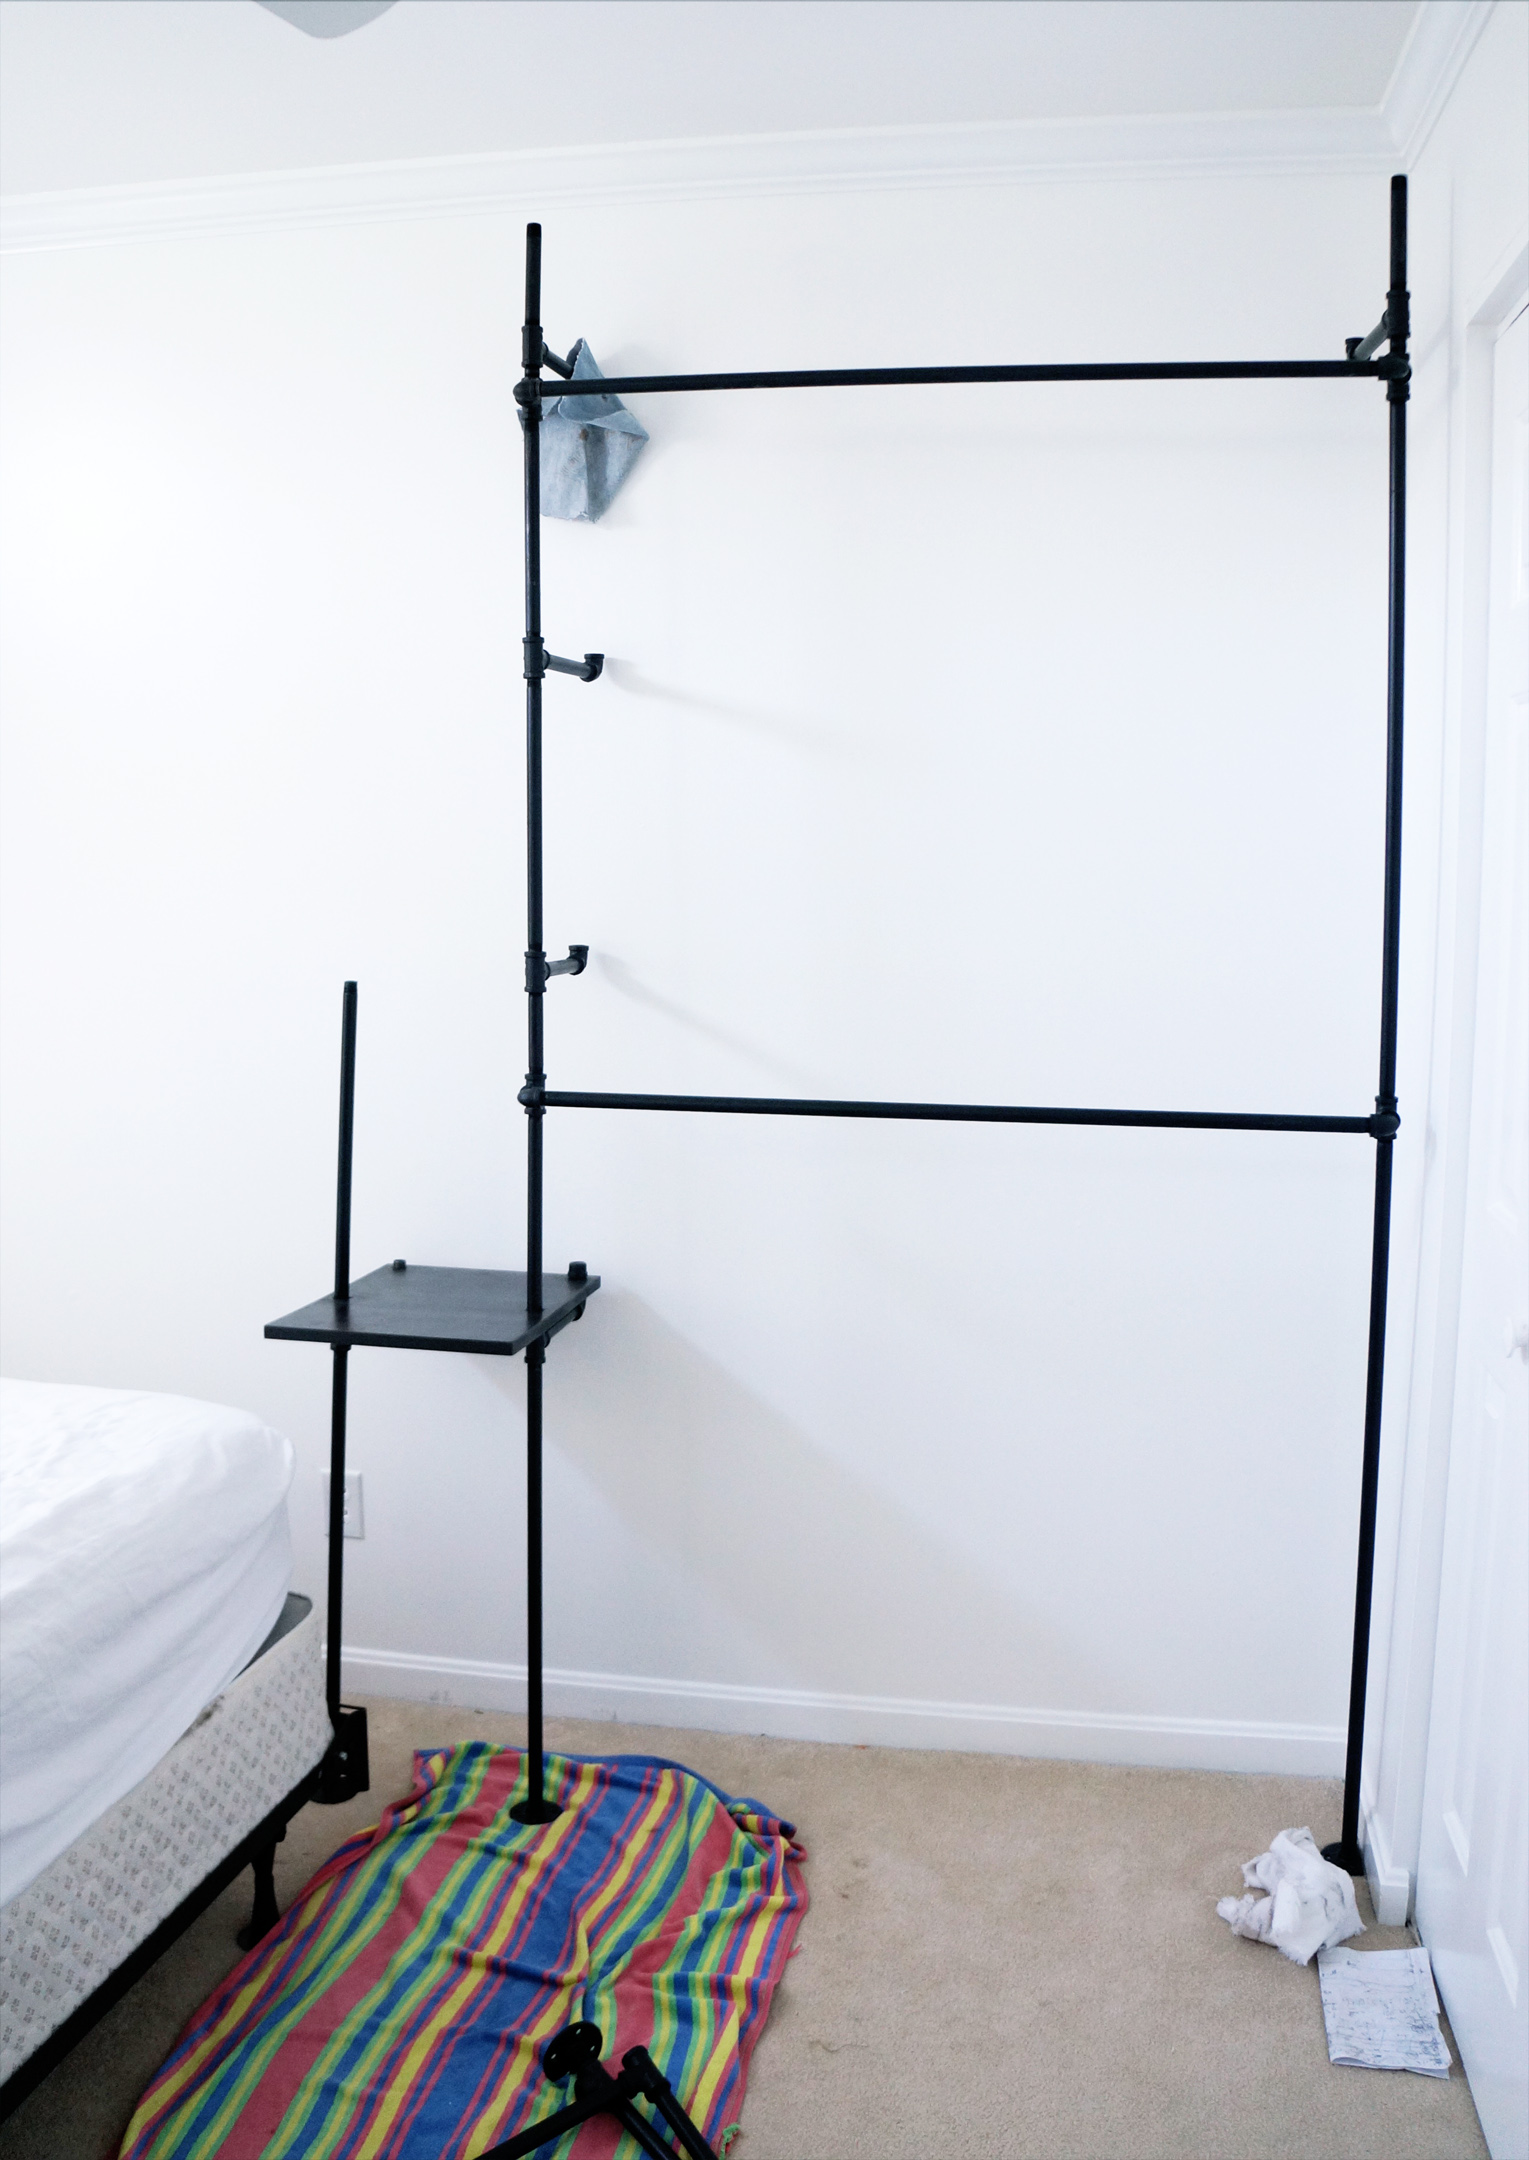
10. Once positioned, screw in all Floor Flanges. Decorate and you’re good to go!! Congratulations on your new shelves!
A very special thank you goes out to my dad on this DIY project. He is an amazing wood worker and builder and these shelves truly would not exist without his help and the hours he put into making this project with me. Thank you Papa Bear!
xxDiana
Shop this post:

Do you think it would be necessary to drill/attach a shelf like this into the floor? Or couldn’t you also just attach both the top and bottom to the wall? (As long as both are in a stud)
I love what you did. I love how it turned out. I’ve been thinking to do something very similar in my room for additional closet space and really appreciate your tutorial and photos. I’m just not sure about putting holes in the flooring to attach the bottom.
I’d love to hear your experienced input:)
Thanks
Sue
Hey Sue,
Thanks so much! It really is my favorite thing I’ve ever created. From my experience, no I don’t think it was necessary to drill the floor flange to the floor, we only decided to do so because if we ever took it out the carpet would cover it and it added extra security. I would however have a piece still reaching the floor (rather than the bottom of the wall) to help push the weight toward the floor rather than it getting heavy and leaning forward as time goes on. Hope that helps!
xx Diana
This is truly fantastic! Would you mind sharing what the approximate total cost was? Just as a gauge. It would be really helpful. I love it. A new pinterest favorite in the making.